Cerbo Knight
Members
- May 14, 2011
- 500
- 8
To all, my Tanaka rifle was playing up from when I bought it so I decided I'd clear some room on my desk and take the thing apart. So I did, and after I familiarised myself with it I decided it would be a good idea to start on the takedown guides I've been thinking about, so without further ado I only give you one warning. This is going to be picture heavy.
NOTE TO MODS: I may have to double post (many times?) to get all of the pictures in, not sure about the picture cap for posts on this forum... Thanks.
Also a note to all: Yes, my fingers/finger nails are incredibly dirty from taking this rifle apart not 10 minutes before these pictures were taken, and I guarantee if you're taking your rifle down for the first time yours will be even worse than mine. Just a point to remember")
So first of all, we're going to start from the very basics and I'm going to cover points that I think are important while I do this guide, starting with the fact that my M40 isn't standard. That much is quite obvious, as I've got a G&G heavy barrel installed and not the standard one so from what I've heard the standard one isn't a free floating one like mine. The standard barrel should have the front sling stud(s) to help secure it. Now the G&G heavy barrel is truly a free float, as it's only attached to the receiver, I'm not going to go into an accuracy debate about Free float vs. Not, it just is free float. Also another thing you'll notice when I get to the bolt, is that I have the PCS bolt, and you may not, and for the most part this won't affect you at all for this guide, it just means that your main screw in the bolt will be longer and you won't have the PCS valve.
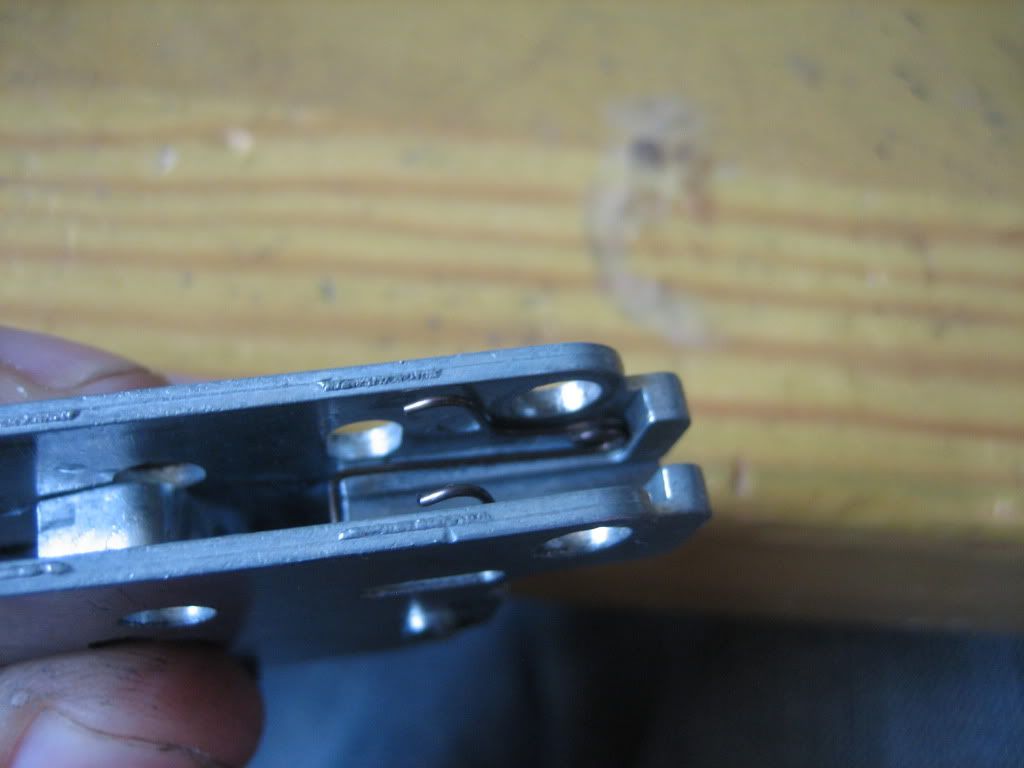
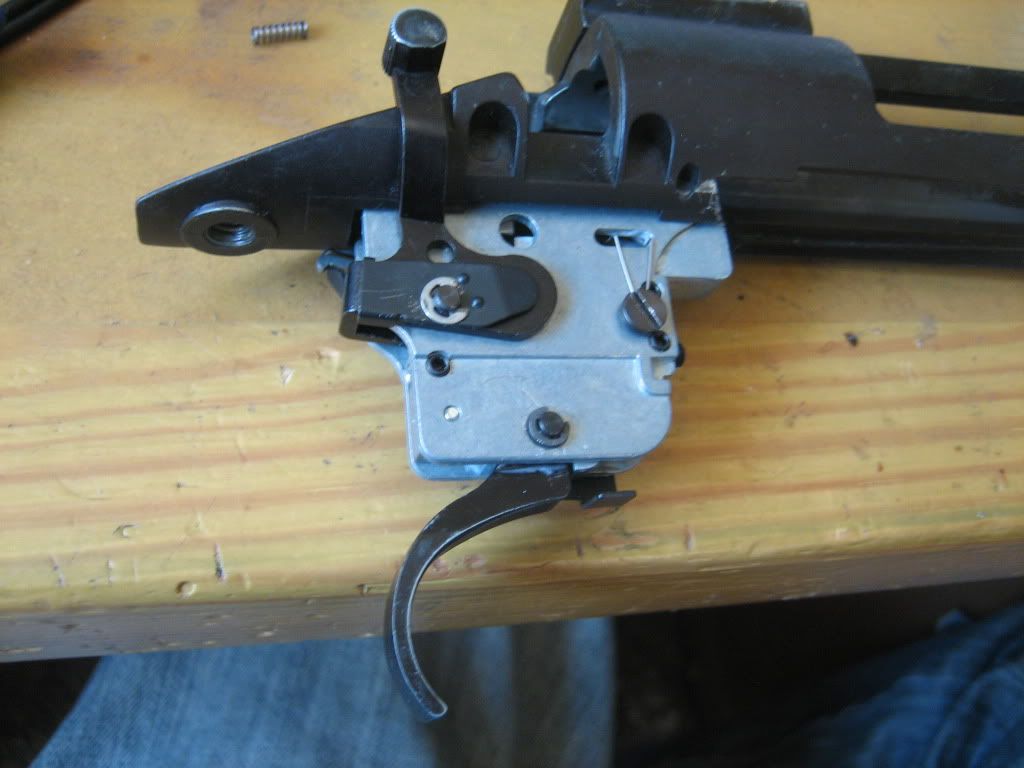
There's also some differences in my trigger mech, I've only got one trigger spring in there. Doesn't affect the performance or stability of the rifle, just means I only have one spring. My KJW has the exact same setup, but if you only have one trigger spring too, then you've got to make sure it's on the same screw as mine. This is very important, or your rifle won't function properly.
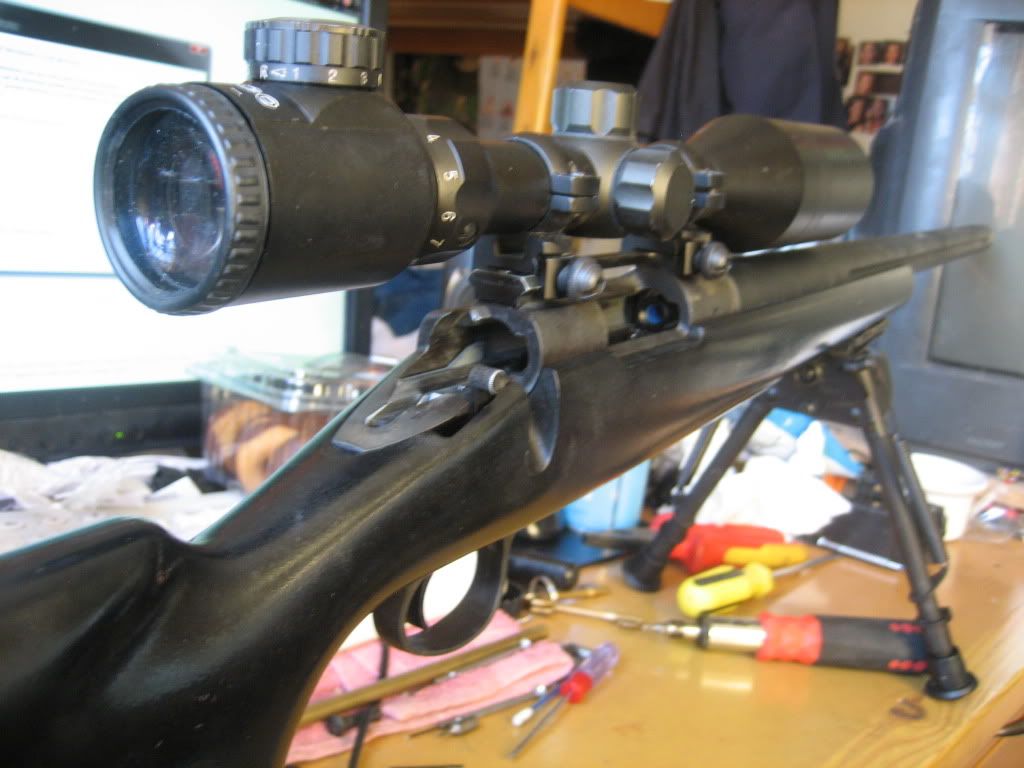
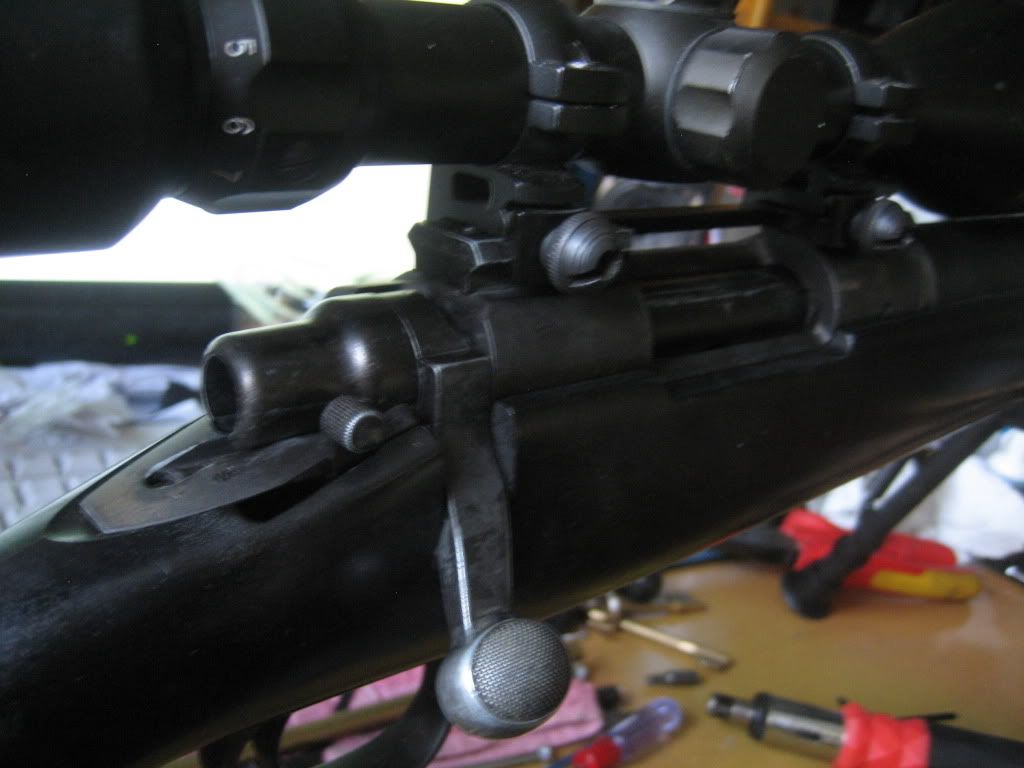
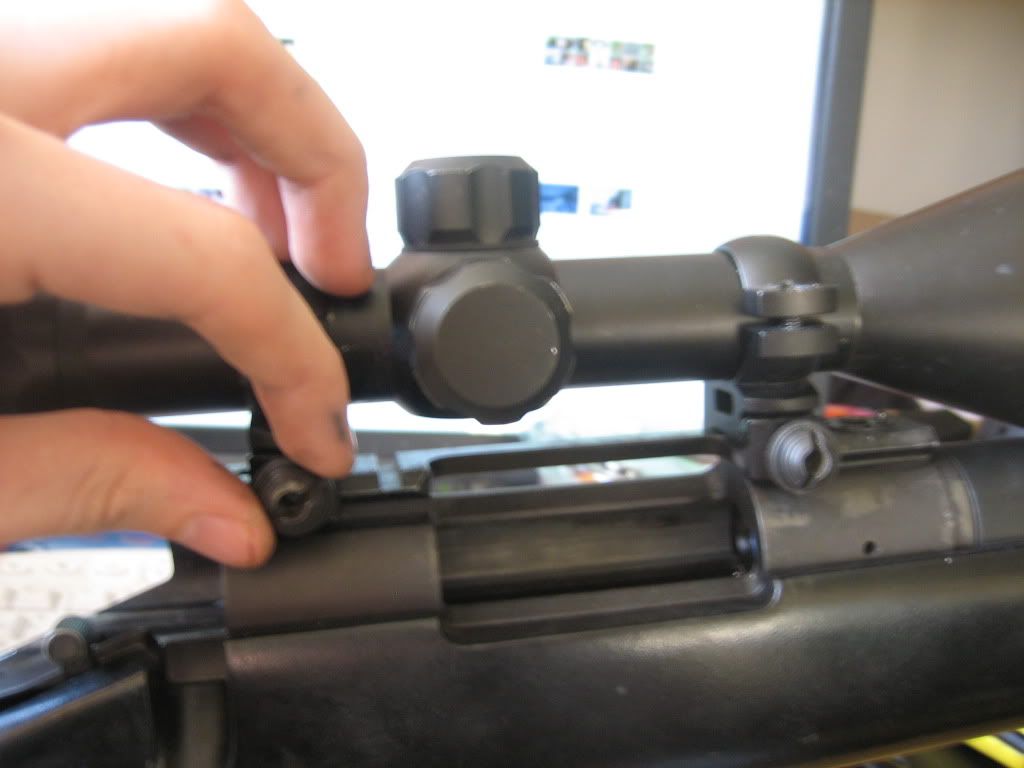
Ok, now onto the actual rifle. First, it's a good idea to remove any optics you may be running. It's just to make handling the rifle easier but most people would likely do this anyway.

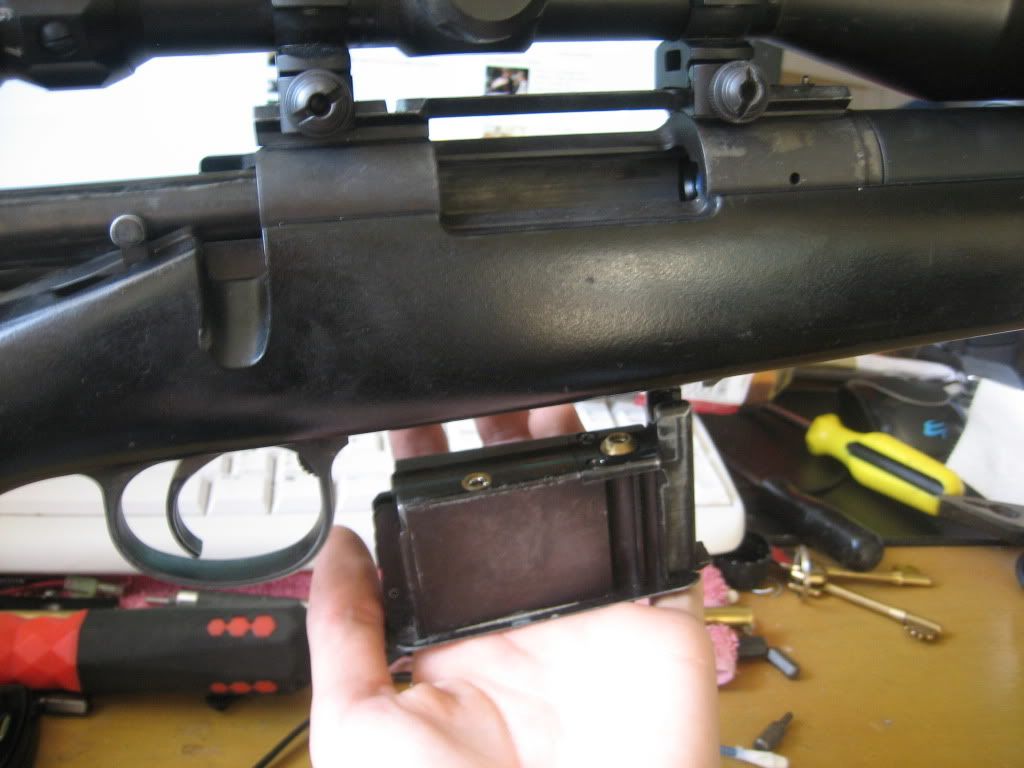
Next to go is the magazine
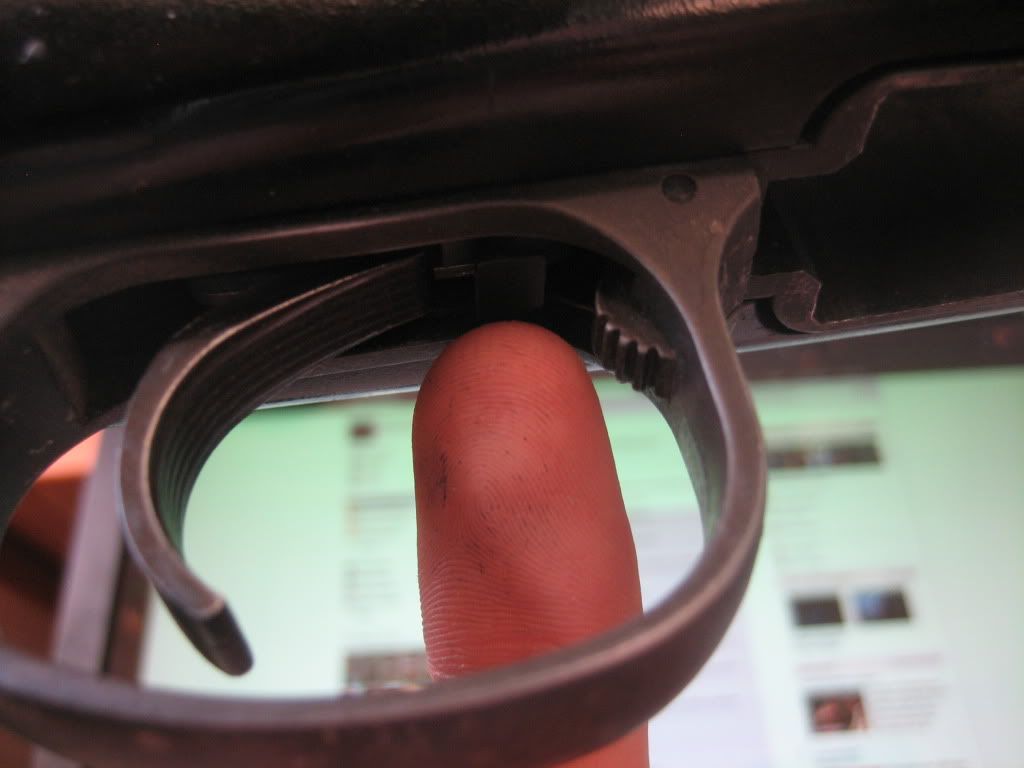
Then you should locate the bolt release button inside the trigger guard, and take out the bolt. It's not necessary, it just saves you having to do it later.
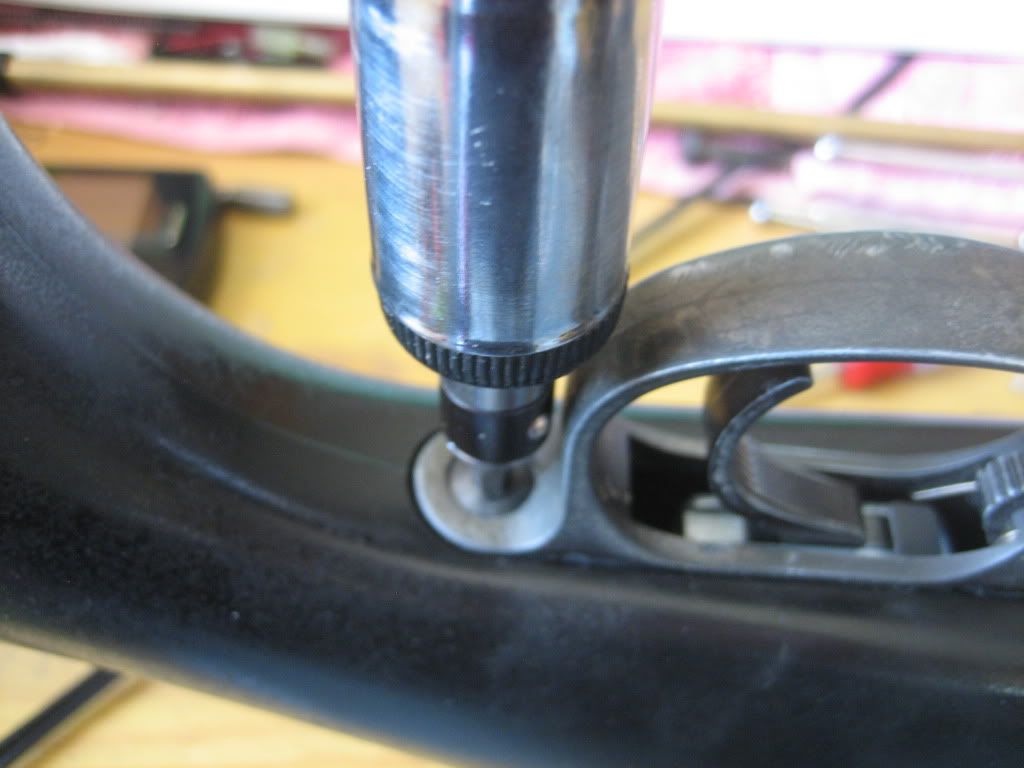
Now we actually get down to taking the stock off, the first bit you're going to need to do is unscrew the sling stud(s) unless you're me in which case you have a non standard barrel
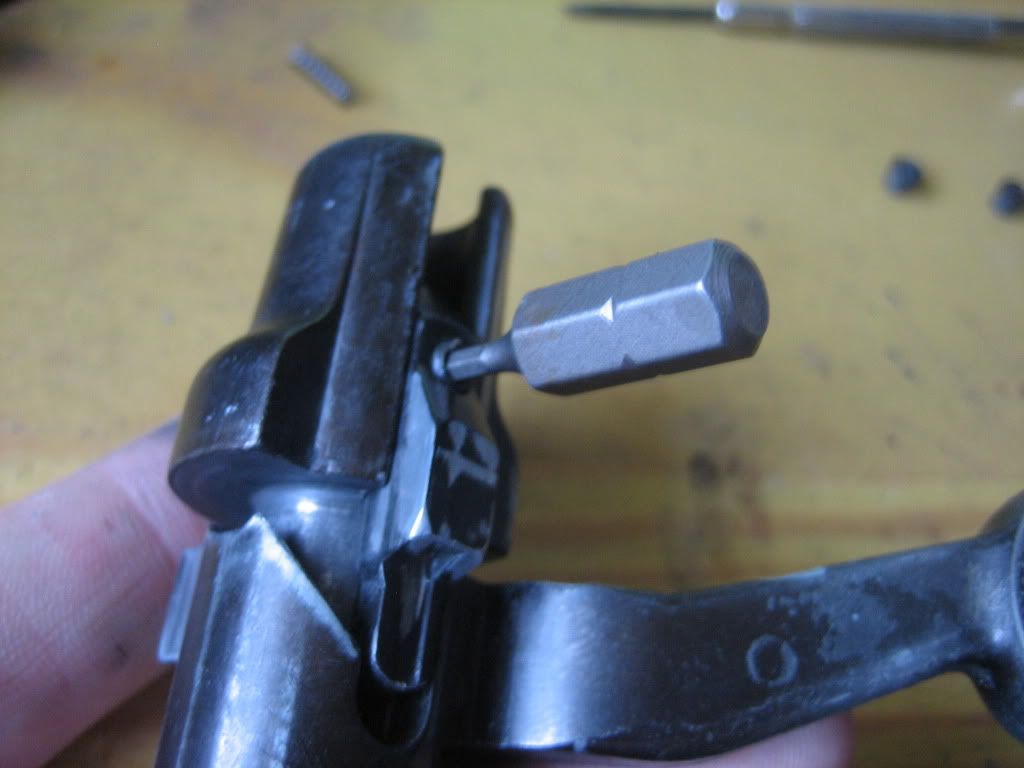
Next goes the allen bolt in front of the mag
Then the allen bolt behind the trigger guard
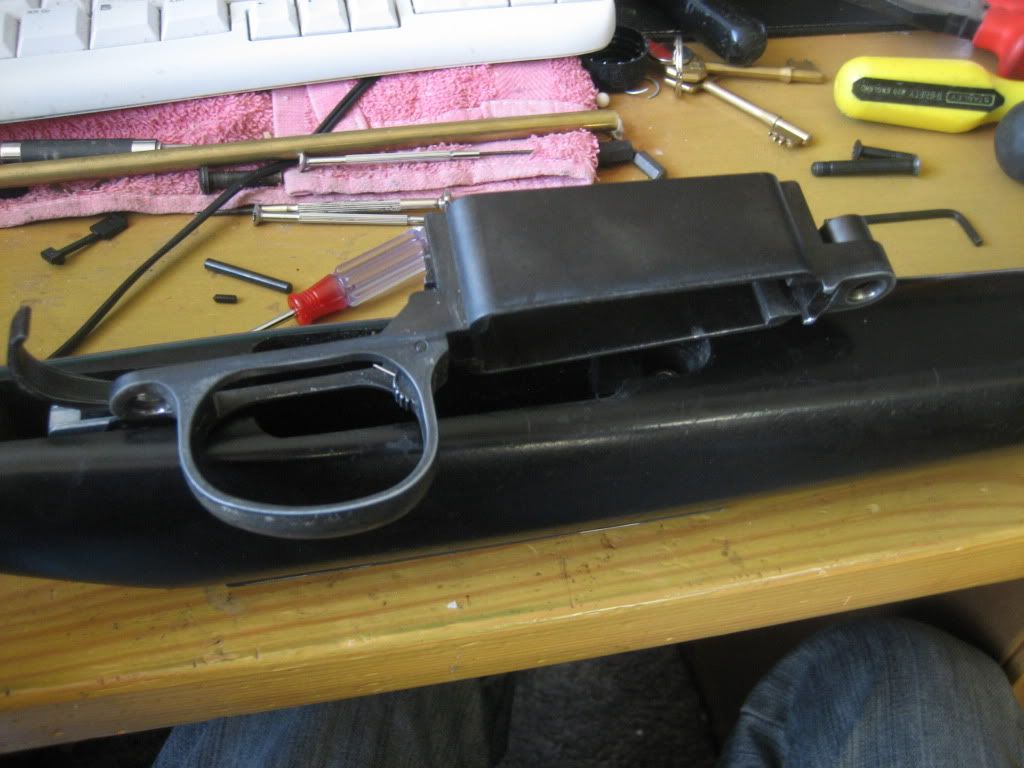
Once you've taken these two bolts out, you can just pull the trigger guard off. Lube/clean the mag release if it needs it, and if it doesn't come out don't force it, just wiggle it out. It will come out eventually.
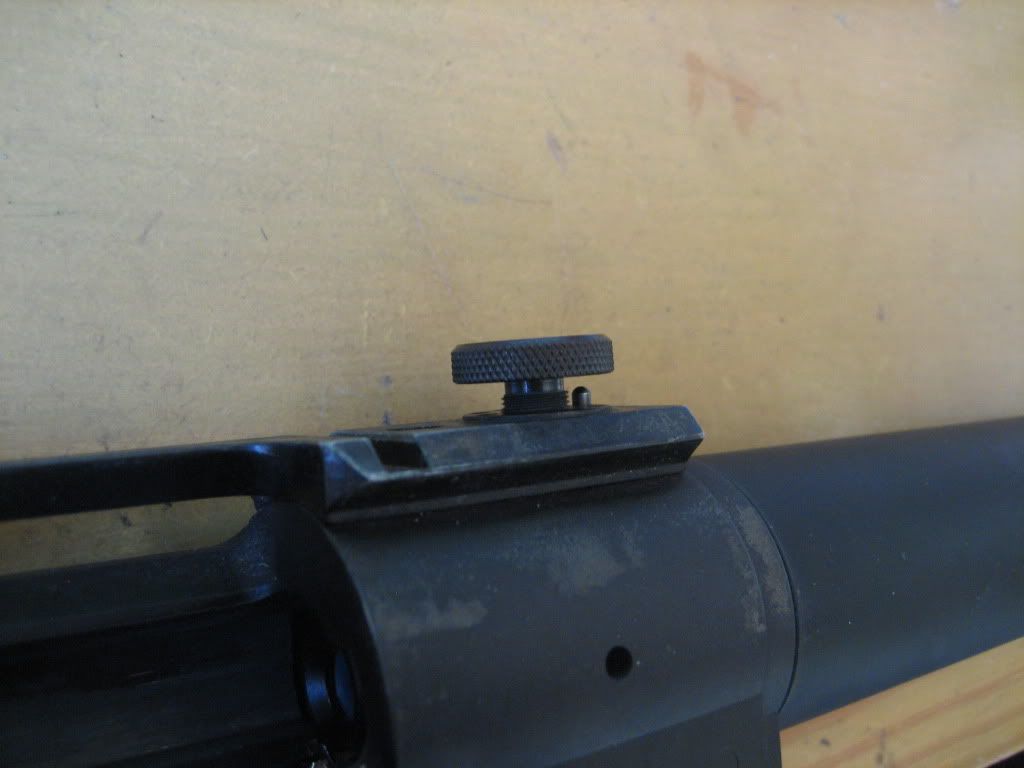
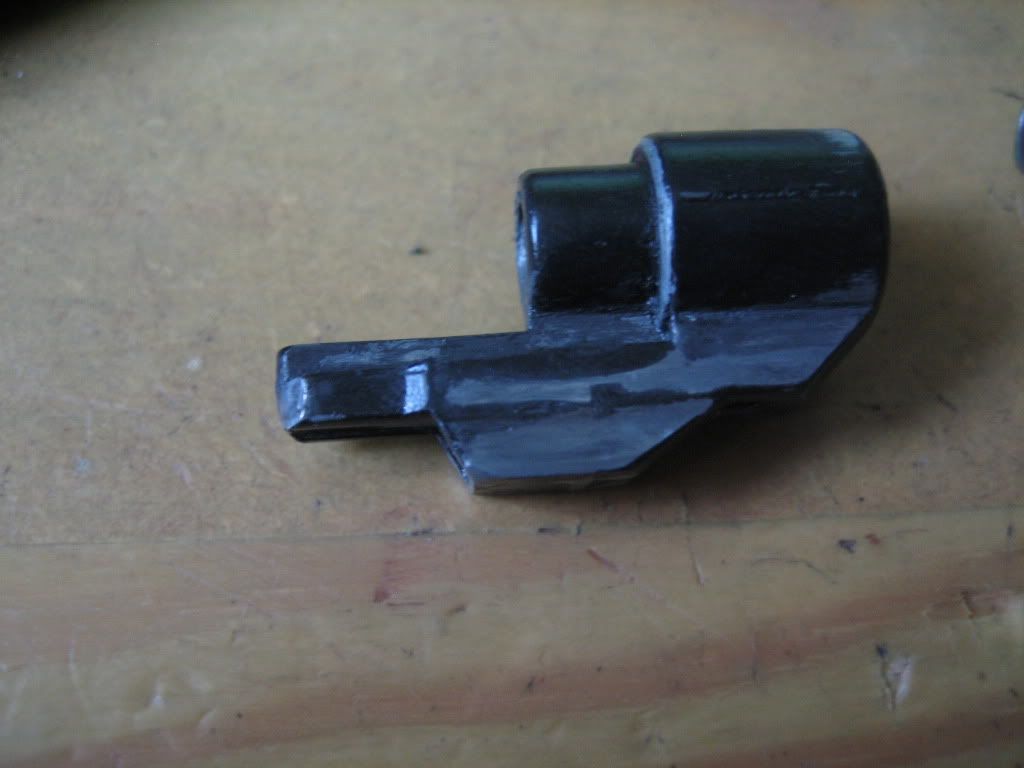
At this point I took my hop wheel out, but you can do this now or later as you please. It just screws out, turn it like you're turning off the hop and just keep going, there's no retention mechanism at all.
Congrats. You've now taken the stock off and you can get down to the action, barrel and hop up.
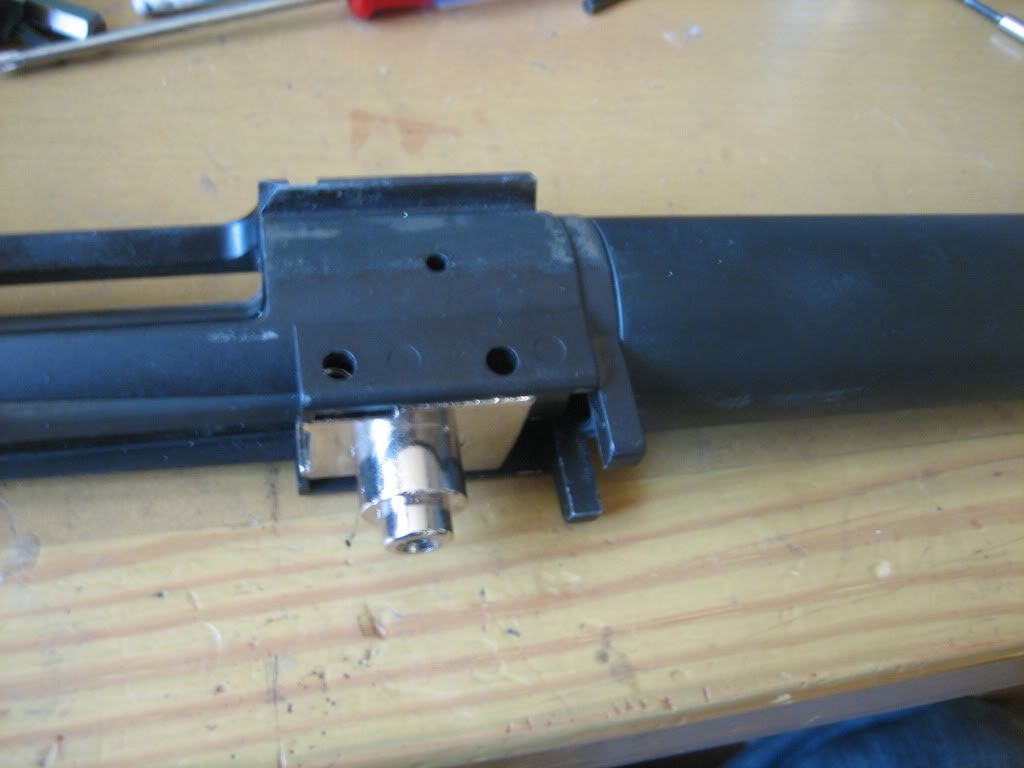
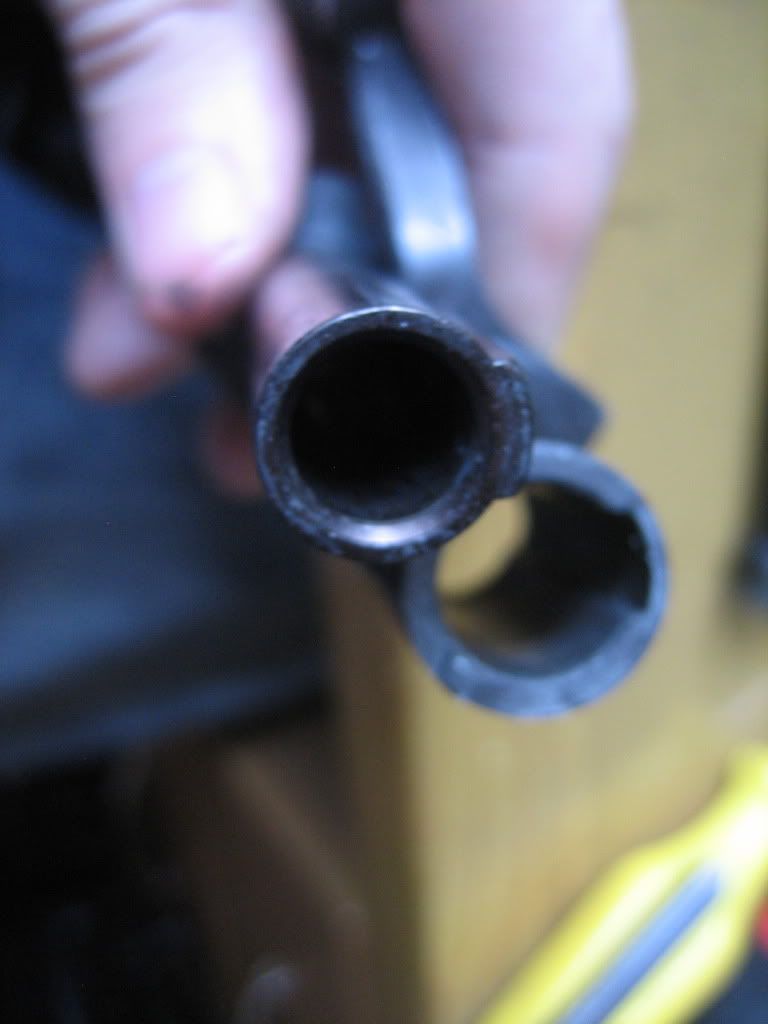
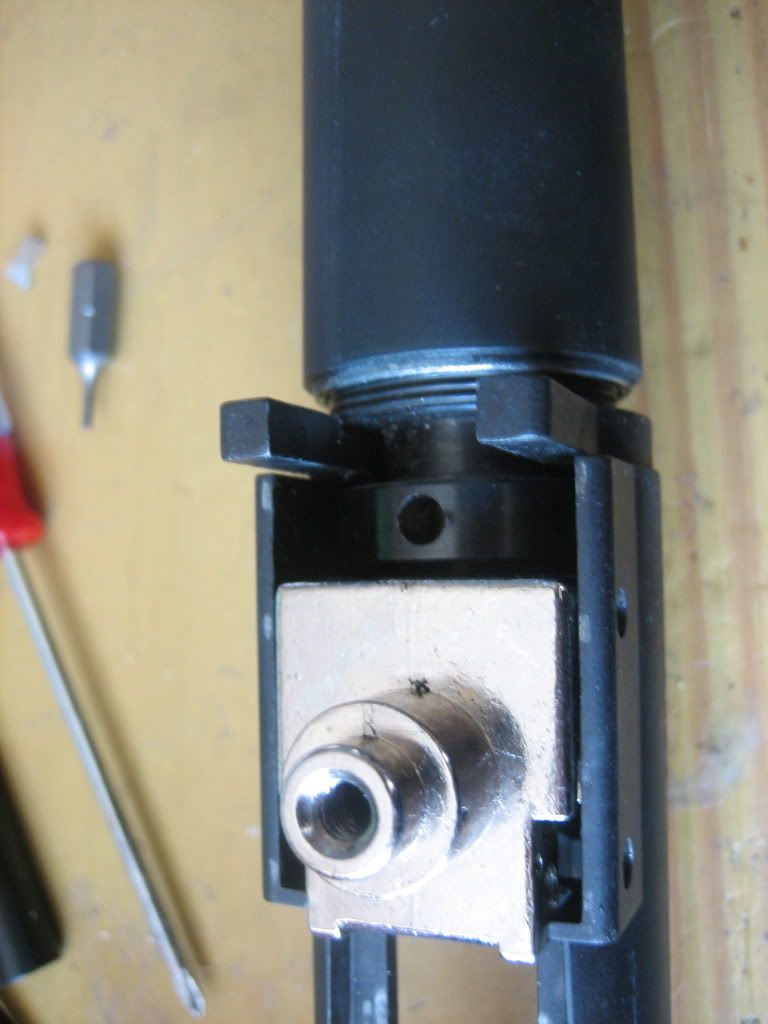
First comes the hop, your barrel will most likely just screw off, if you look closer you'll see the threads that my barrel is attached to. If it has screws in place, then unscrew them.
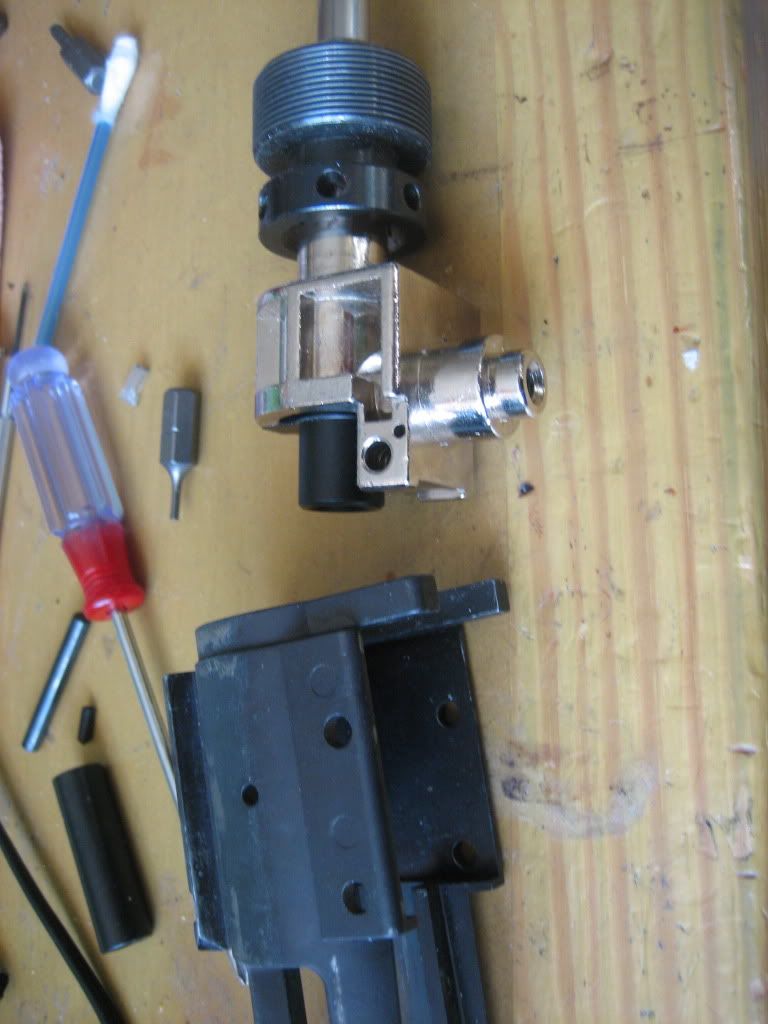
once the barrel is unscrewed, the retaining 'nut' will come away from the receiver, bringing the inner barrel and hop up with it. Put the receiver aside because at this point you're not going to be touching it.
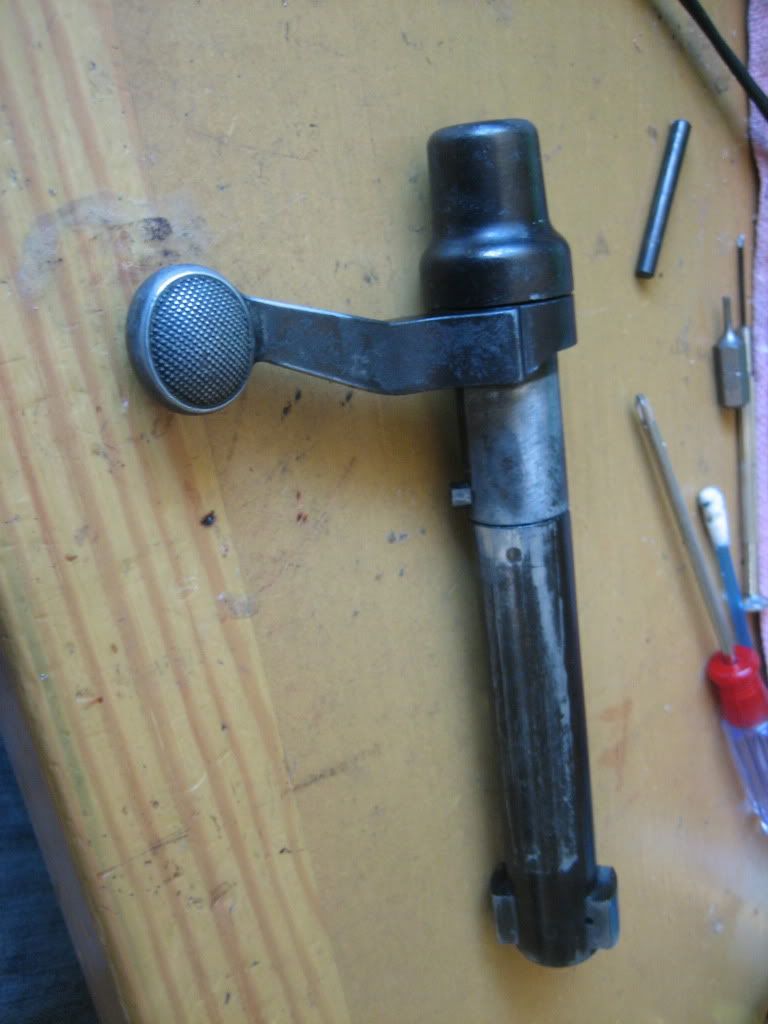
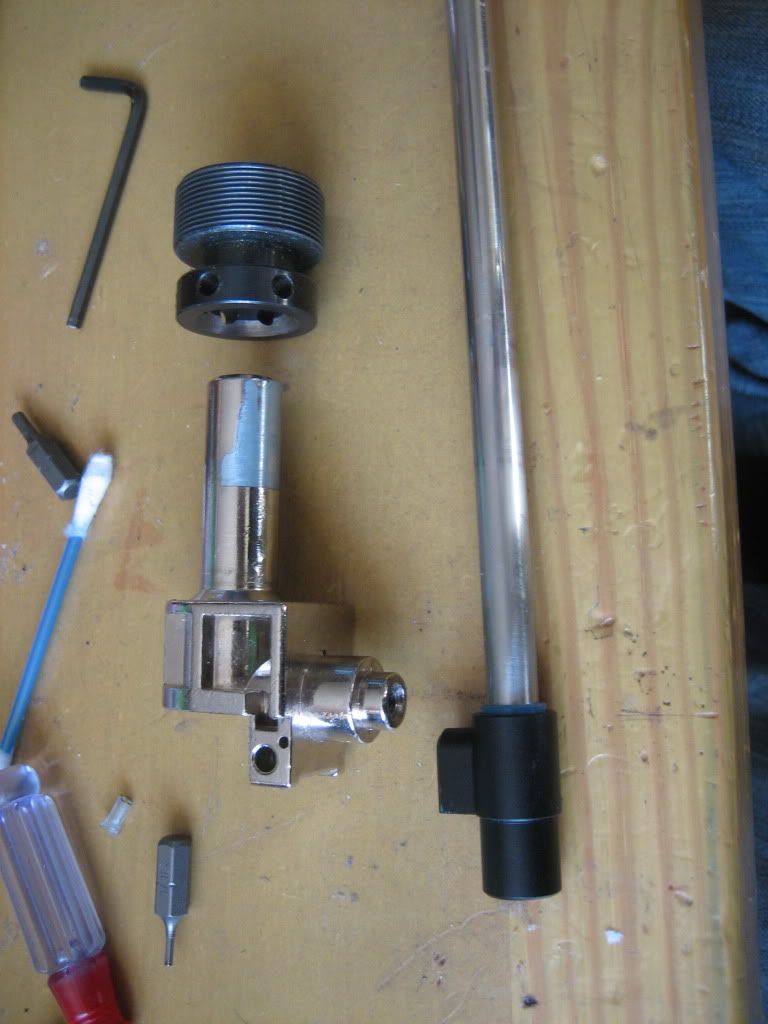
The retaining barrel 'nut' and hop 'brace' will just slide off of the inner barrel, you can put these aside and you're left with the hop chamber, rubber, and inner barrel. I'm planning to replace the stock hop chamber with a Kings Arms or Spartan Doctrine chamber, so I can use VSR barrels and buckings. Much more effective than the stock hop up (especially mine, more on that later).
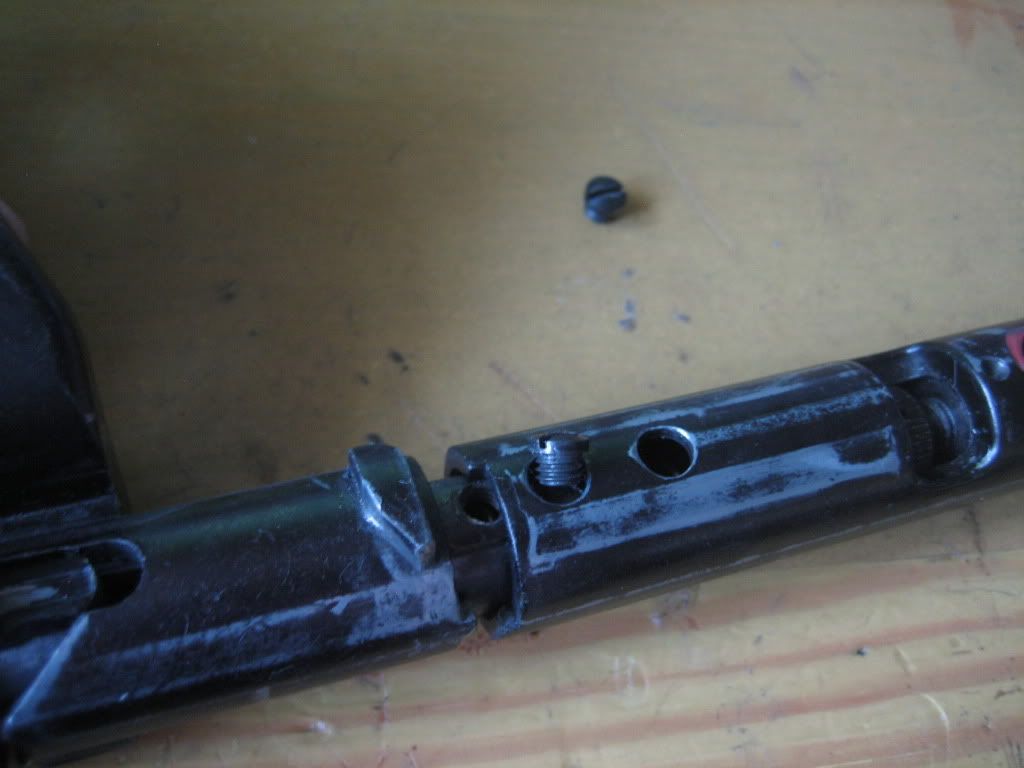
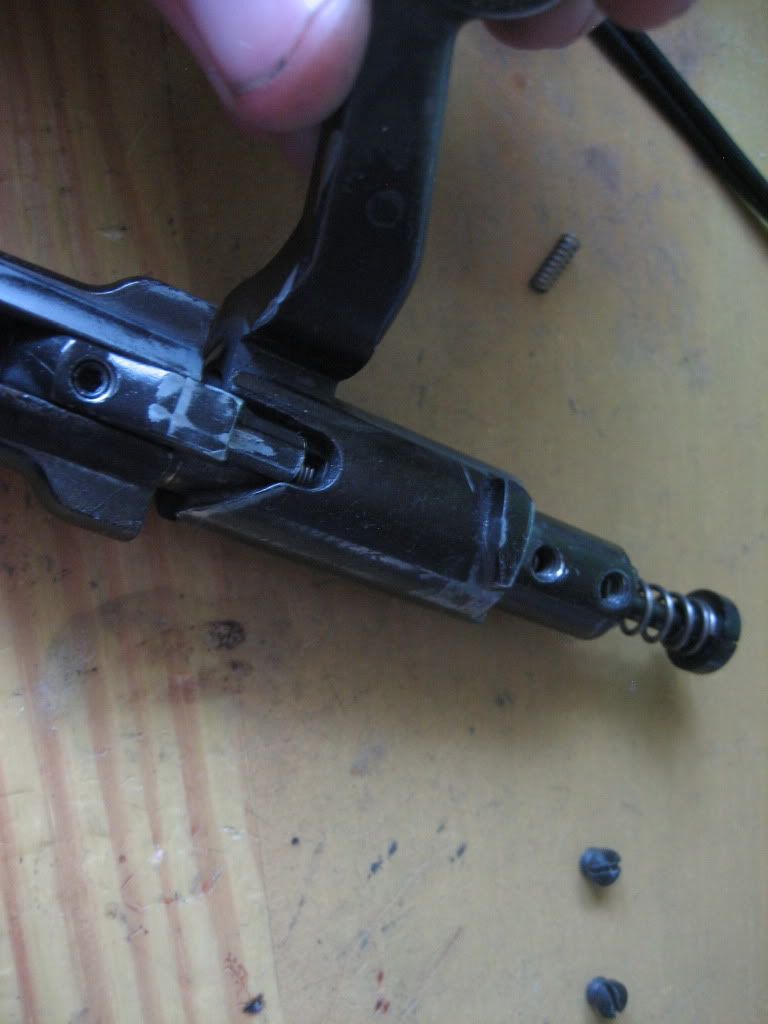
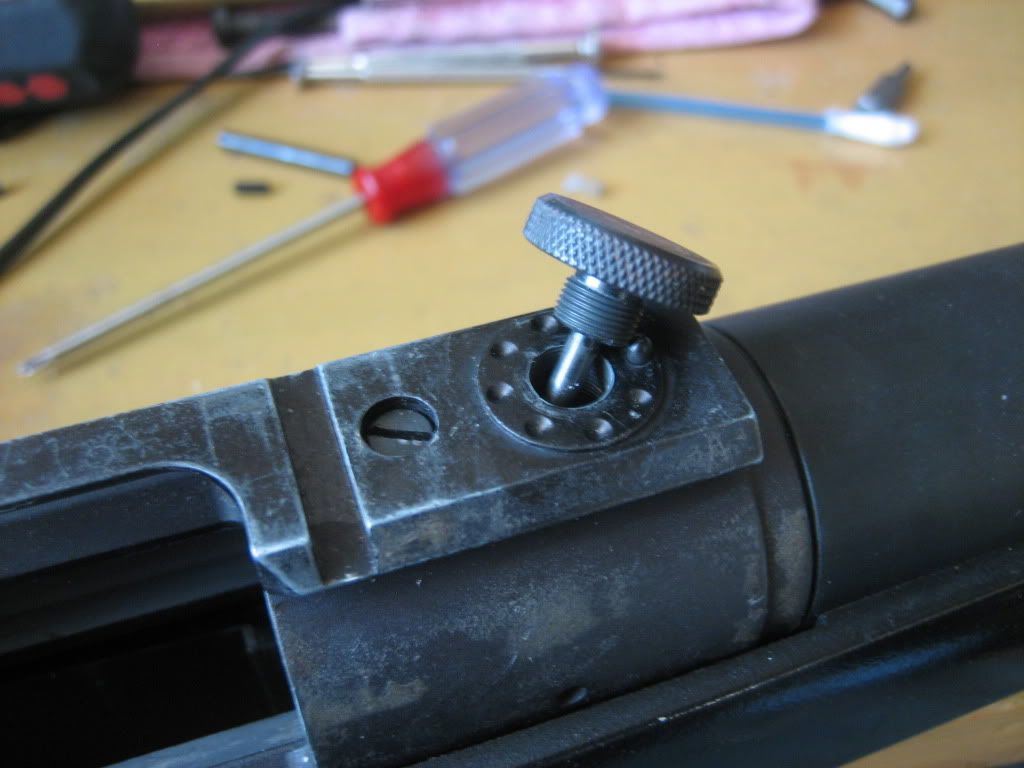
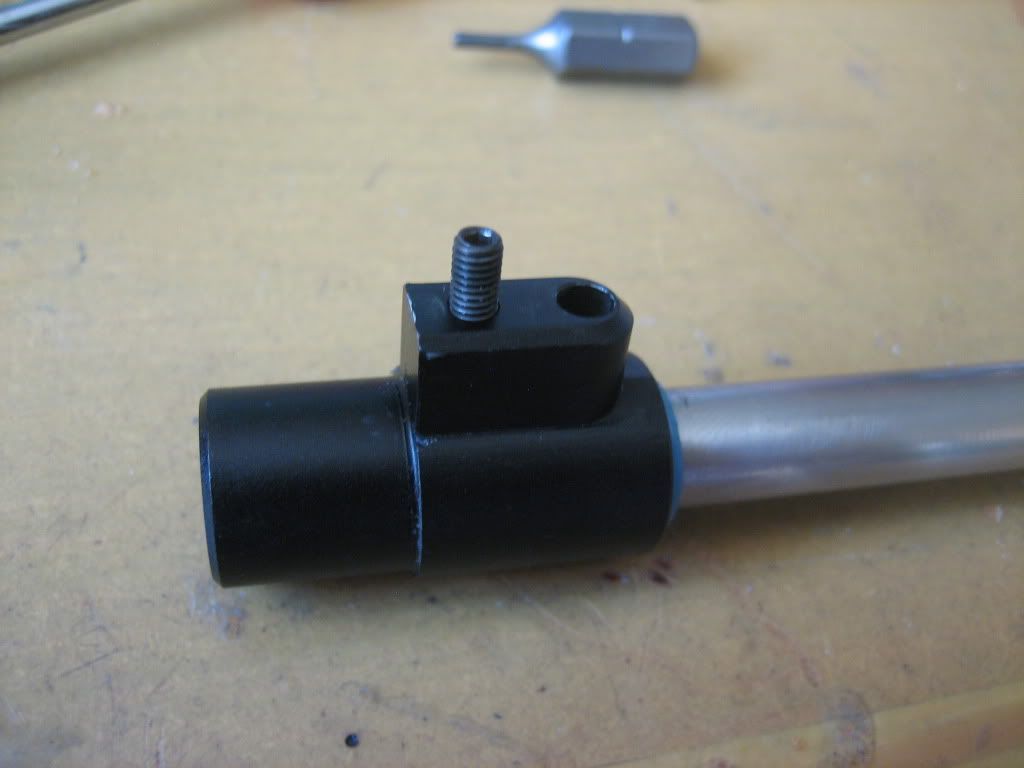
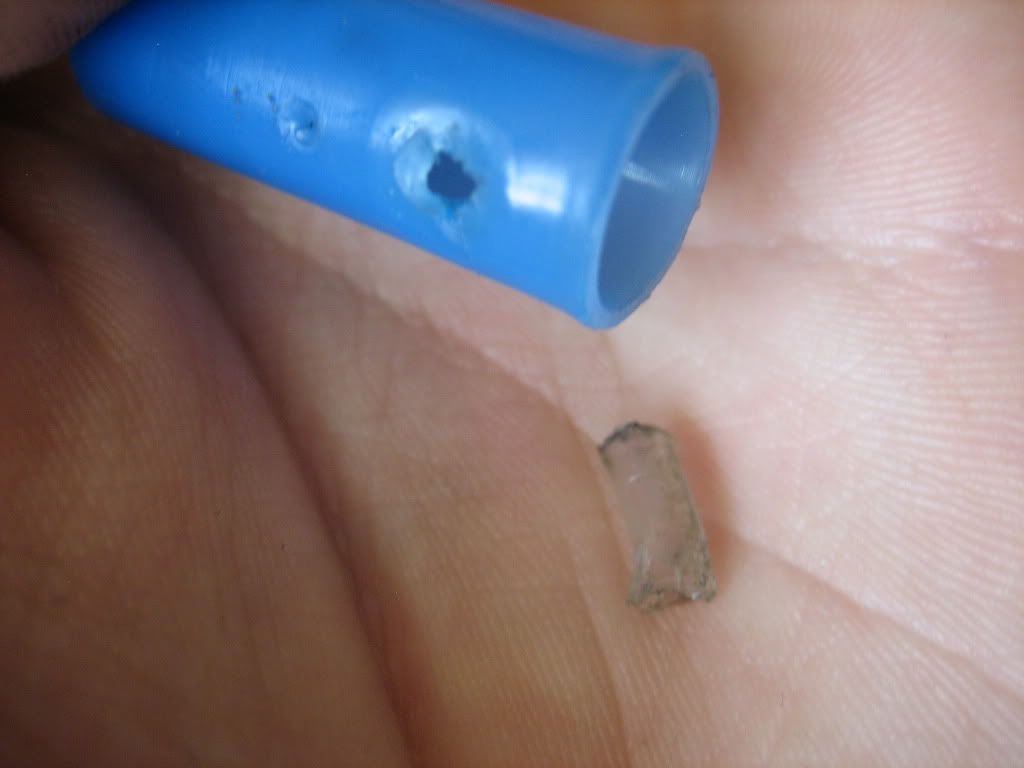
Make sure you unscrew the retaining grub screw in the hole pictured, it'll tear your bucking to bits if you don't. The other hole is for your nub.
So the main reason for my taking apart this rifle was that my hop was acting like it was fixed. and this is why! No wonder. The makeshift nub was so ruffed up and sharp it had just torn right through my stock bucking. This is why people shouldn't bodge job their gas guns and sell them without checking them first! Oh well, the whole rifle was only £100... With a scope, bipod and all you see in this guide.
This being the inner barrel and stock hop up chamber, without the bucking on so you can see the cutout for Tanaka Barrels.
Now we're going to move on from the barrel and hop up, and go onto the receiver. You can now assemble the barrel if you so wish and are done with it.
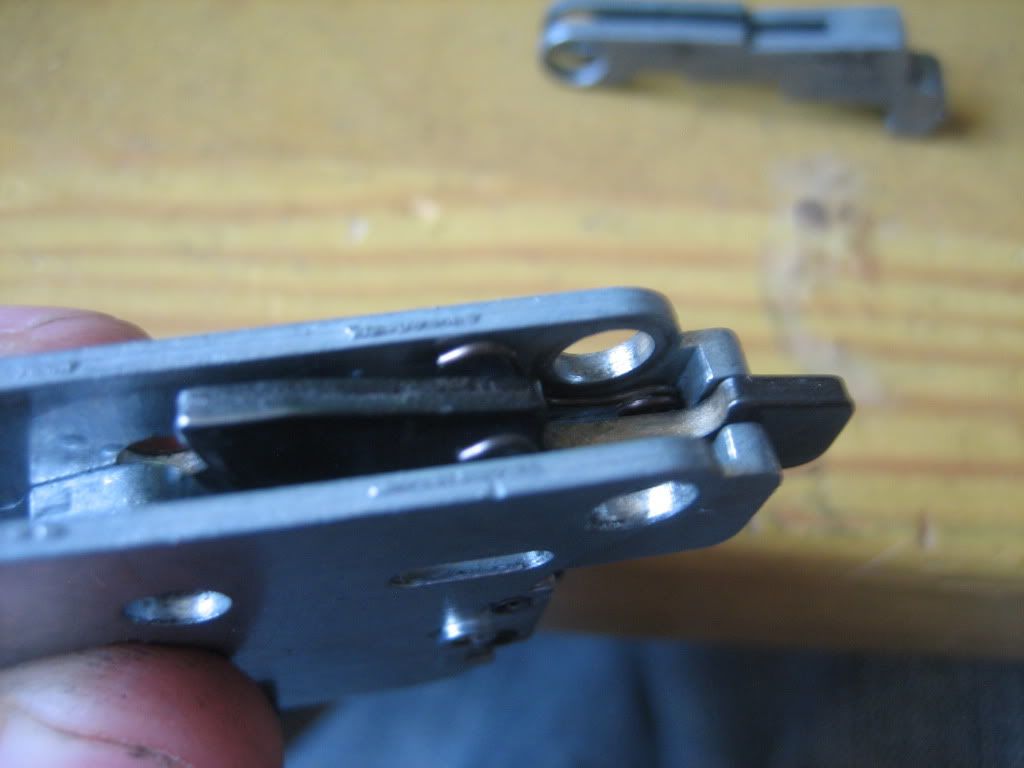
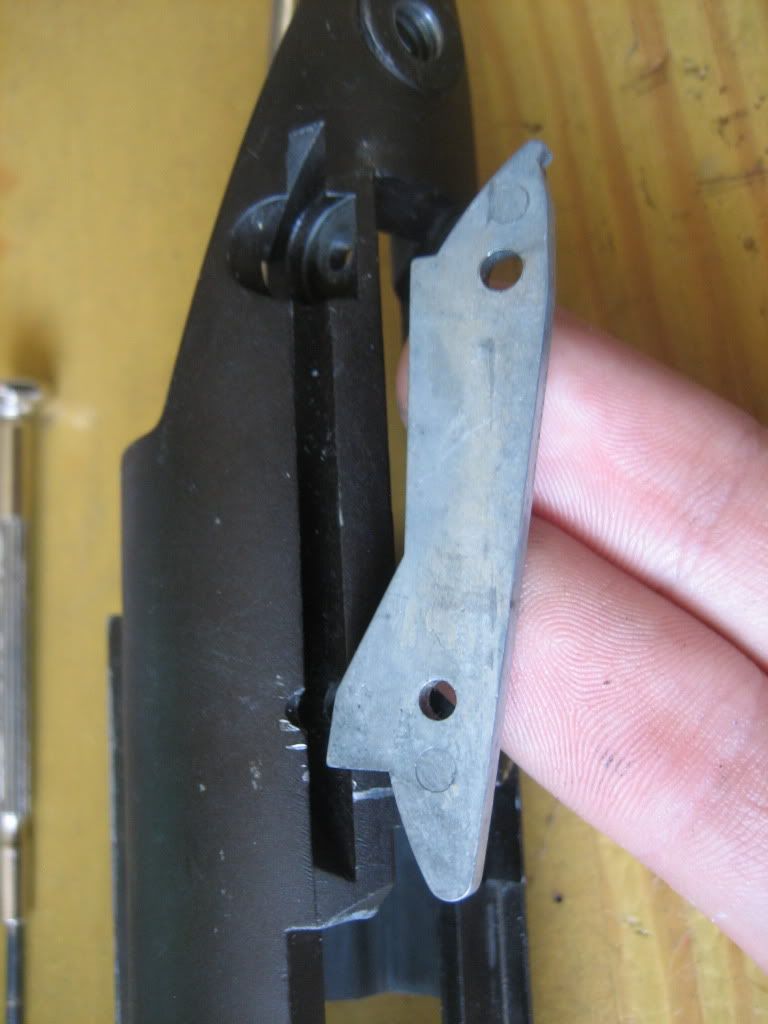
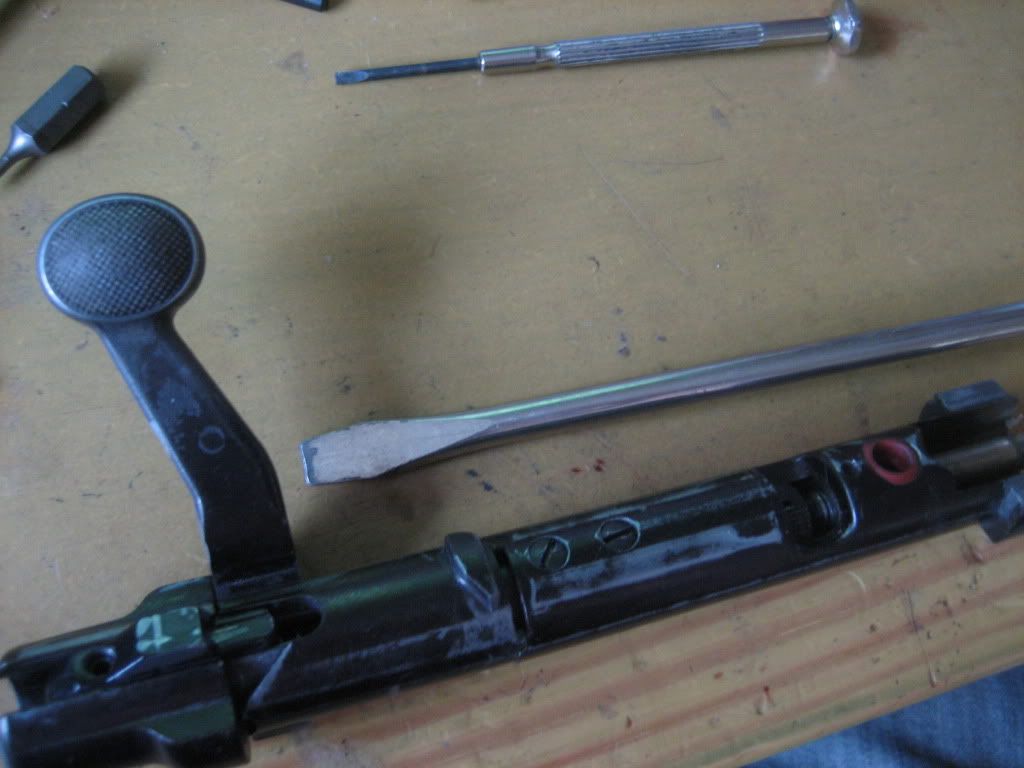
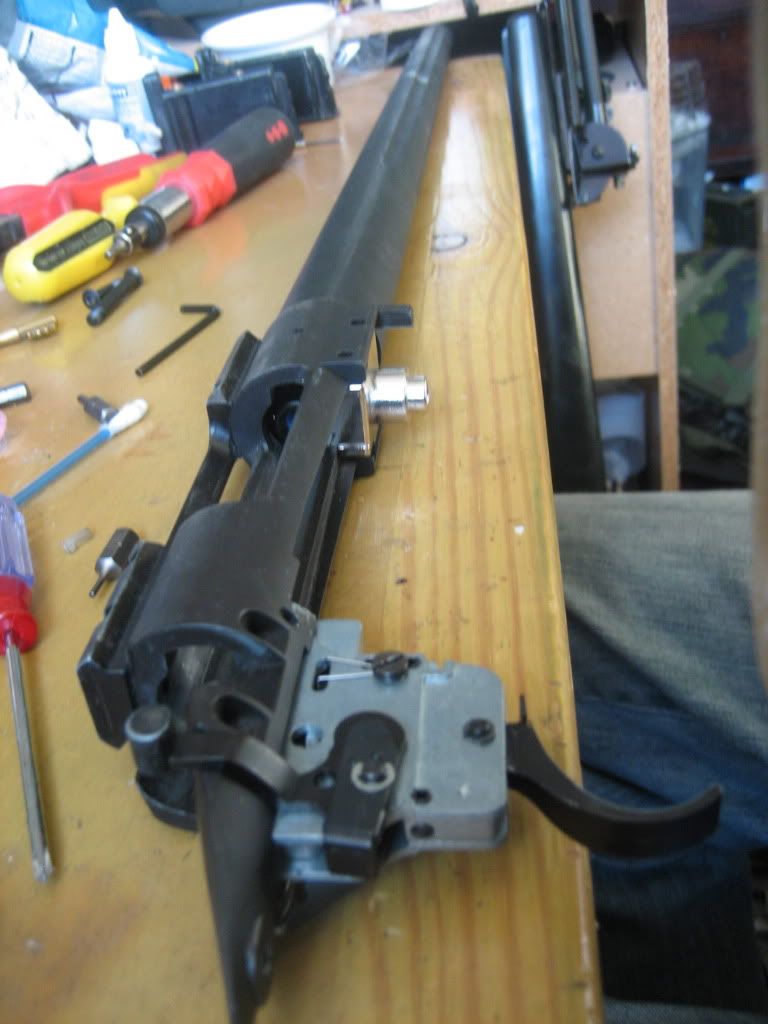
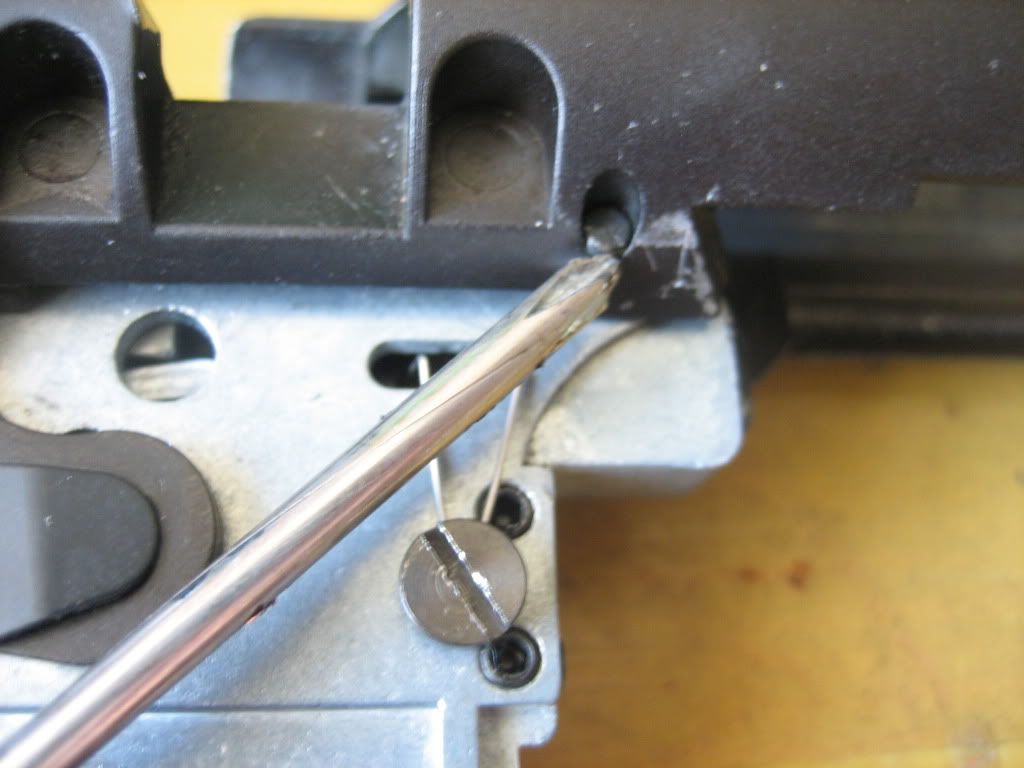
All you need to do to get the trigger mech out, is punch two pins out. The first being here;
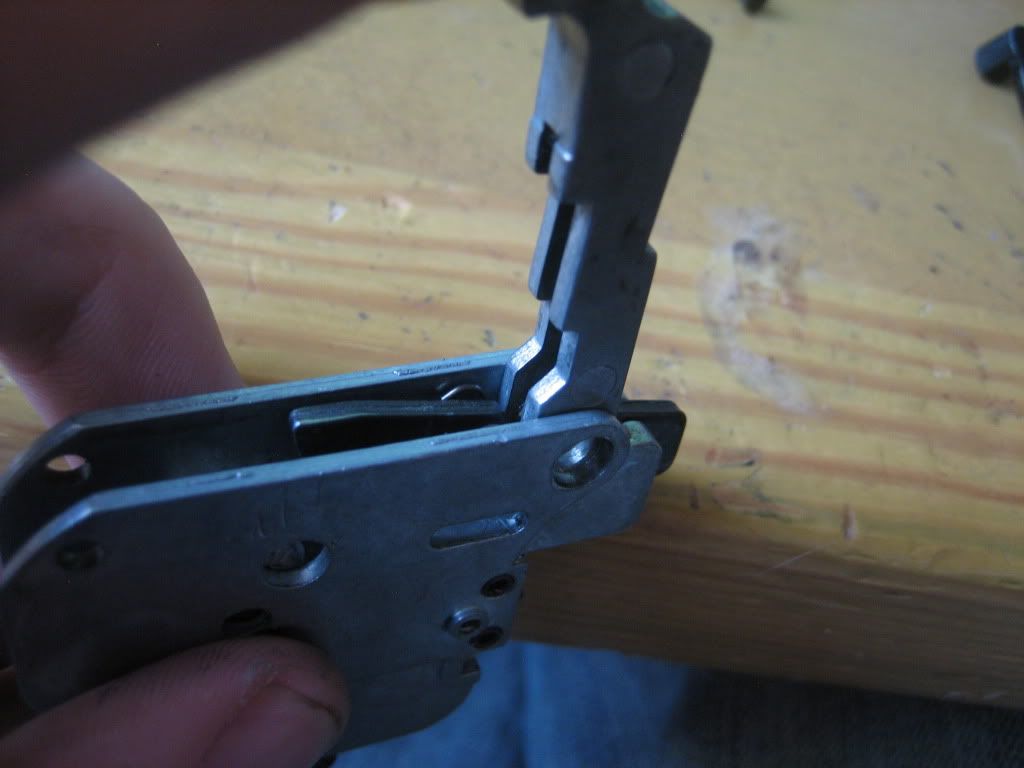
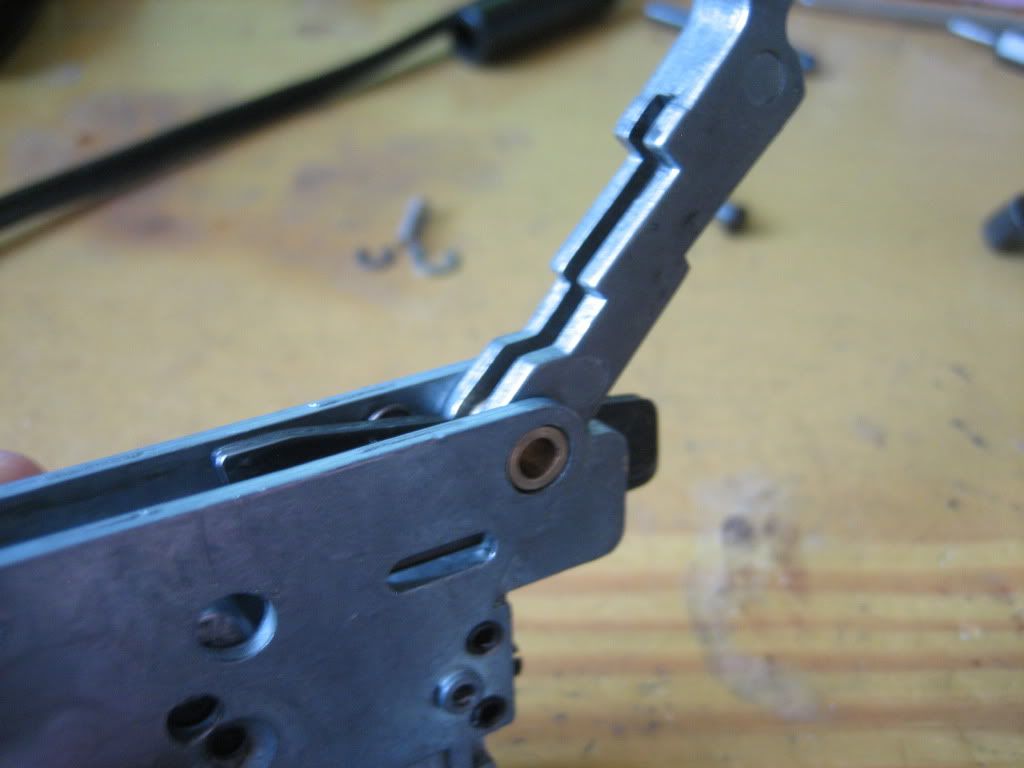
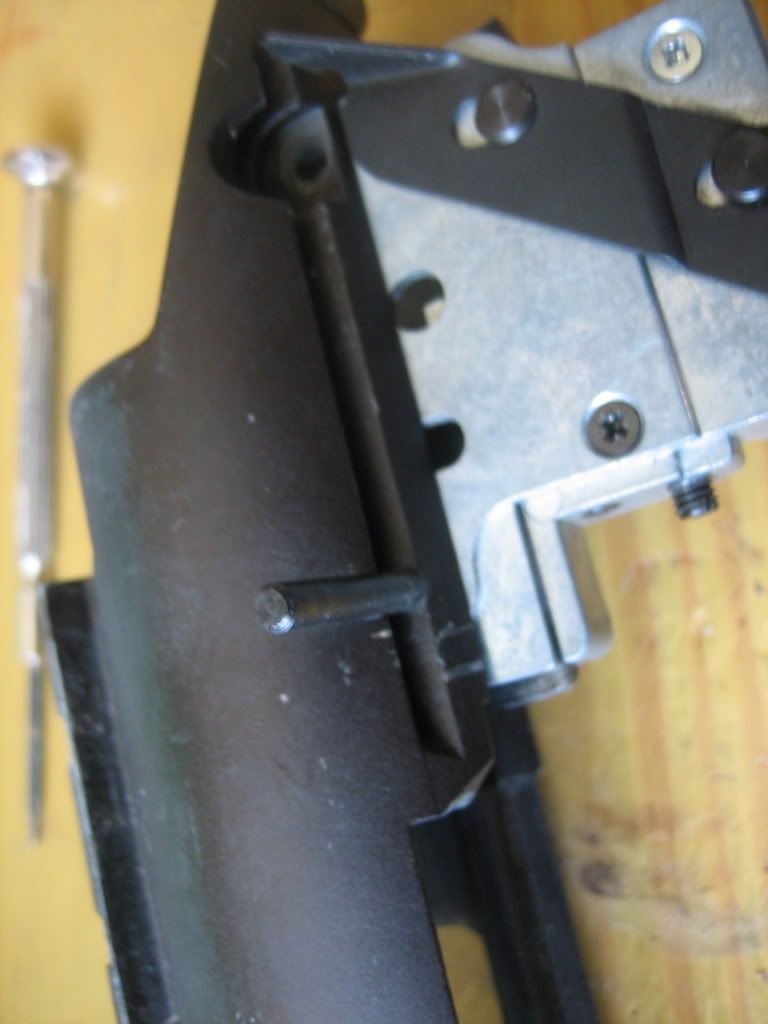
The second is here, but you can pull it from this side because it has almost a nail (think hammer and nails) type head on it;
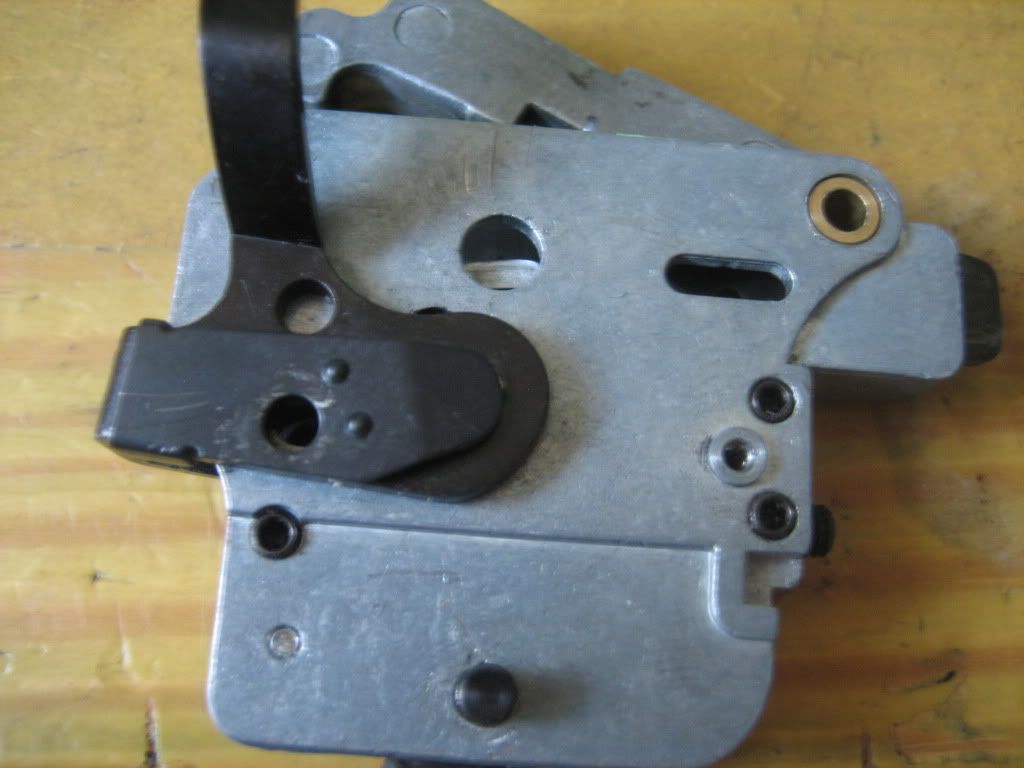
Now all you're left with is your bare bones receiver, put this aside to avoid accidental damage by knocking the damn thing off of your work space. Almost did that myself, but it was balancing off of the edge of my desk...
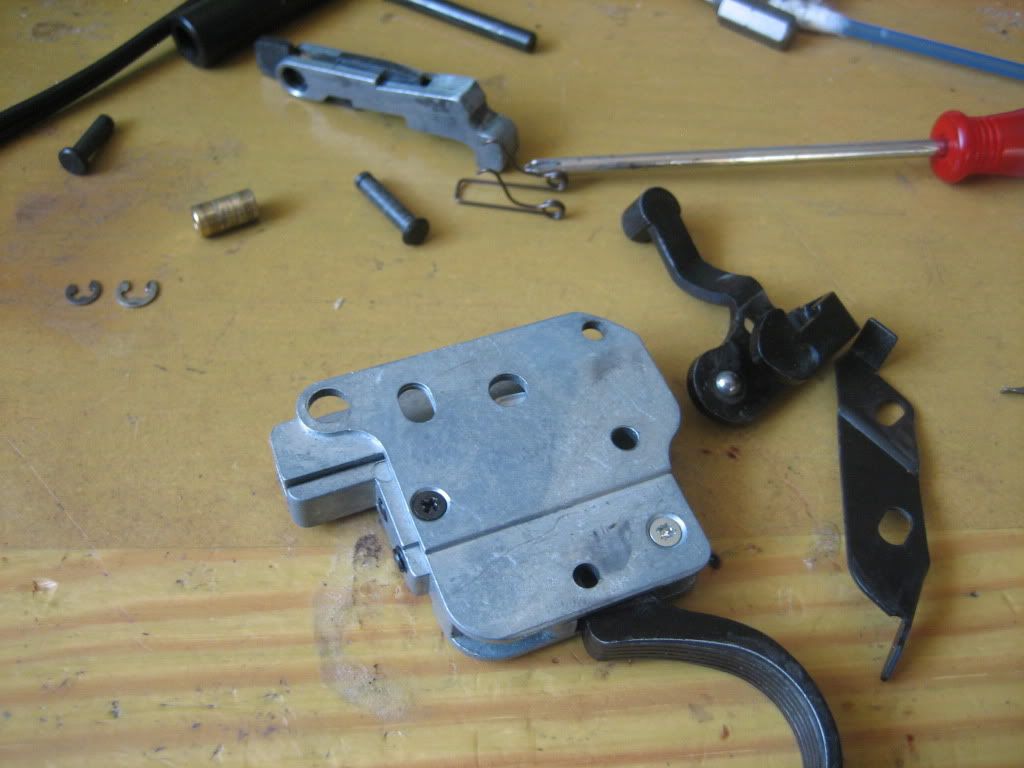
Usually, all you need to do maintenance-wise is drop some silicone oil or white lithium grease (thin) into the mech, and pull the trigger a bit.
For those who have trigger issues, never fear! I'm here to help and I know all about the trigger.
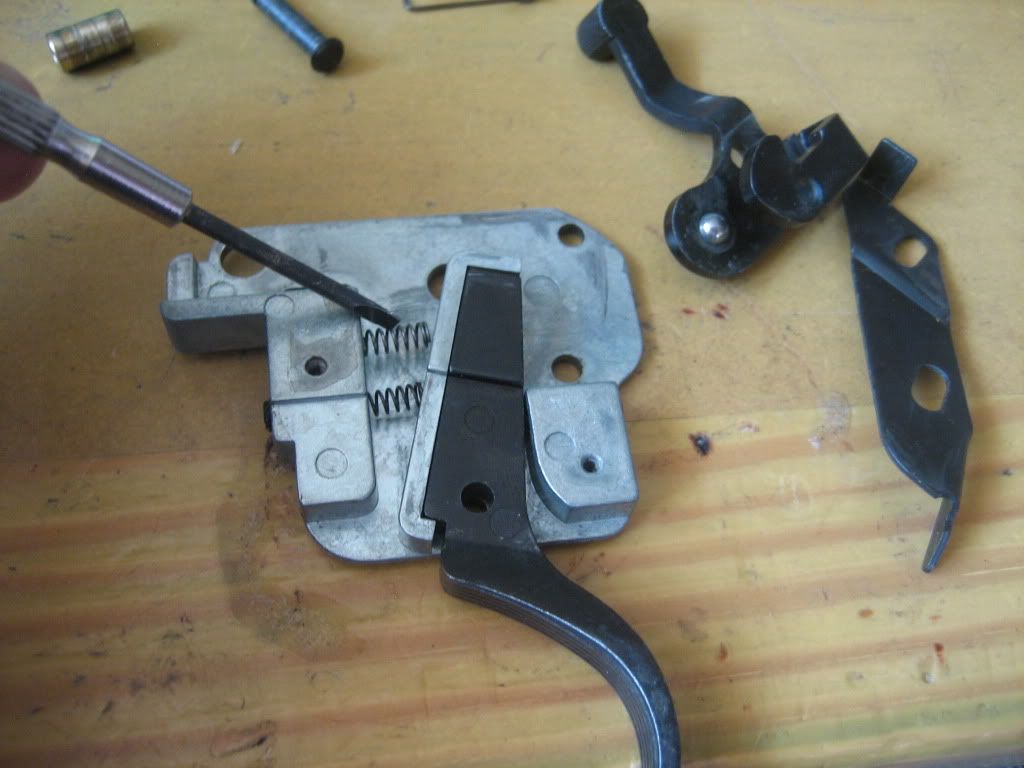
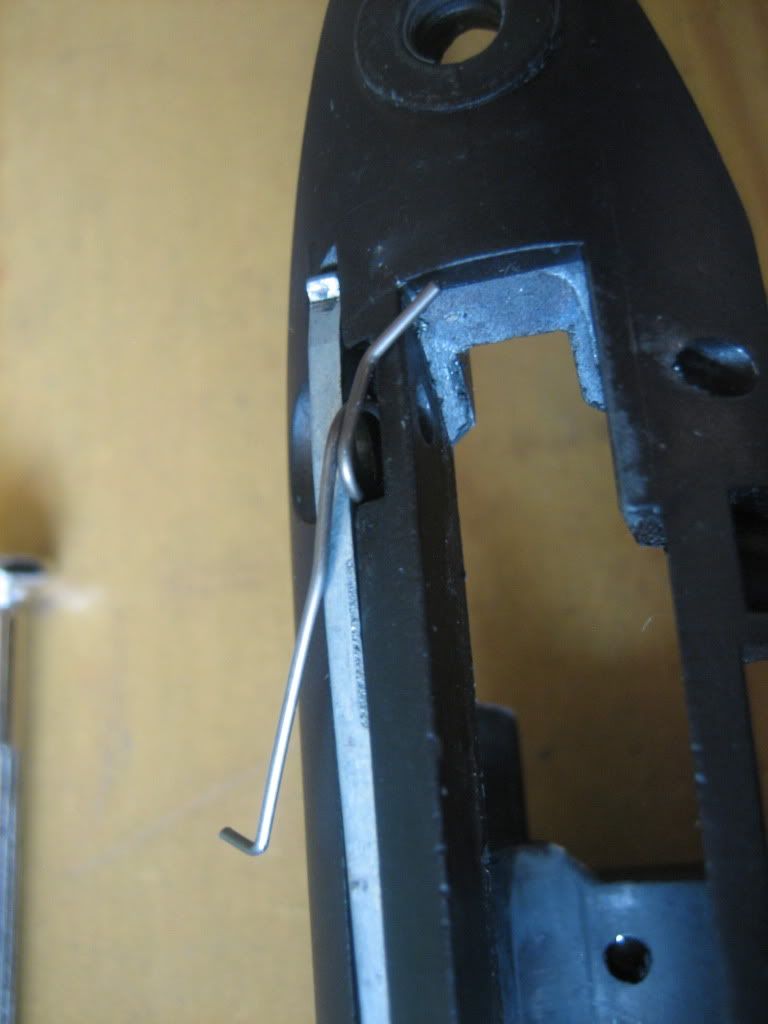
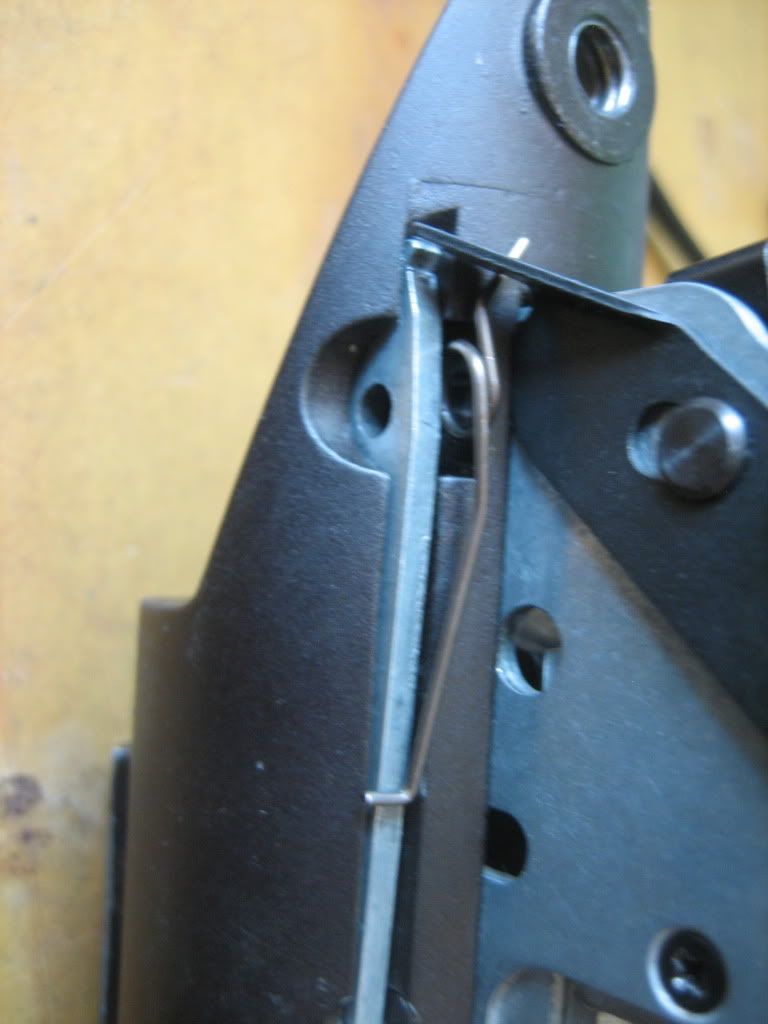
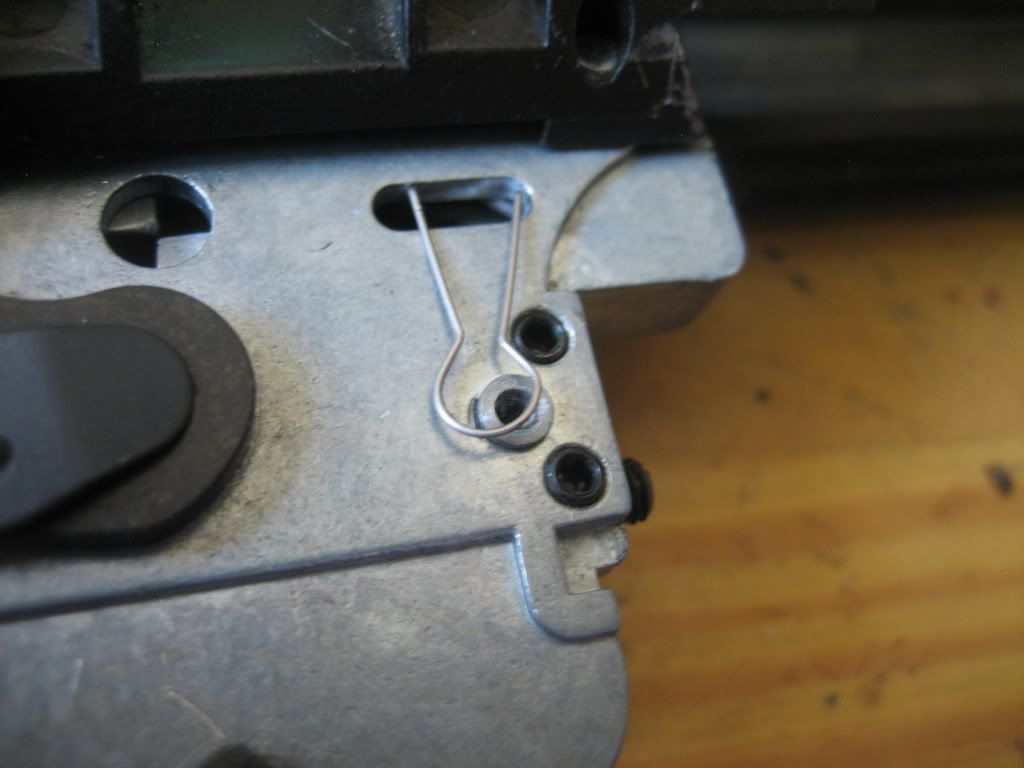
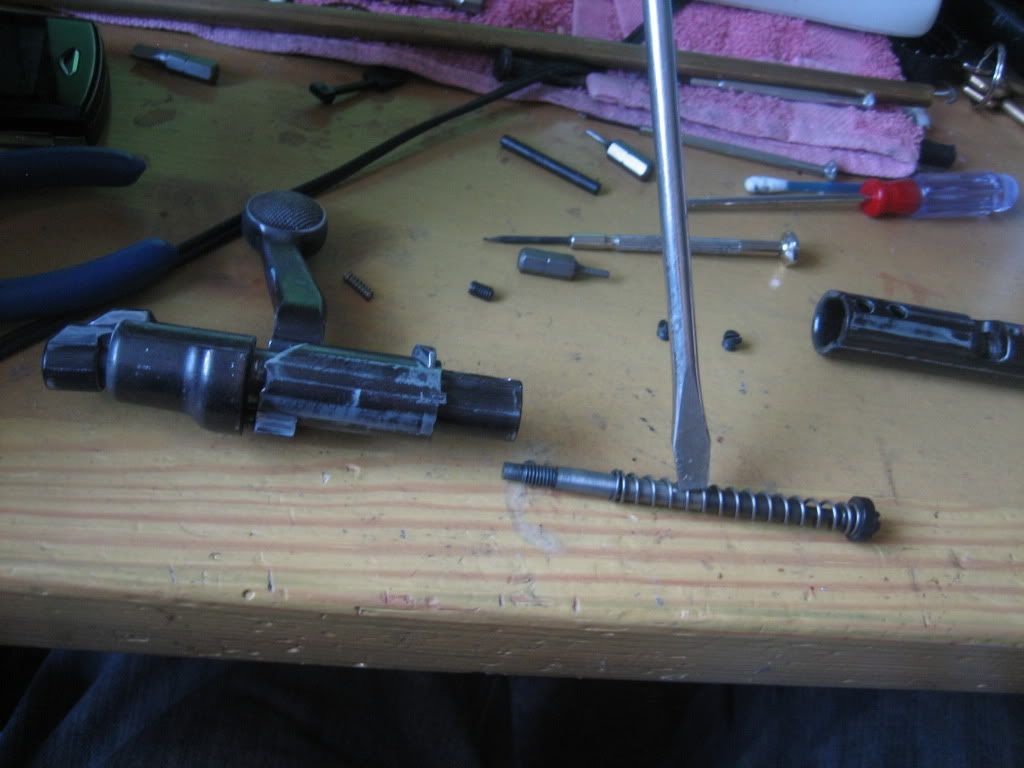
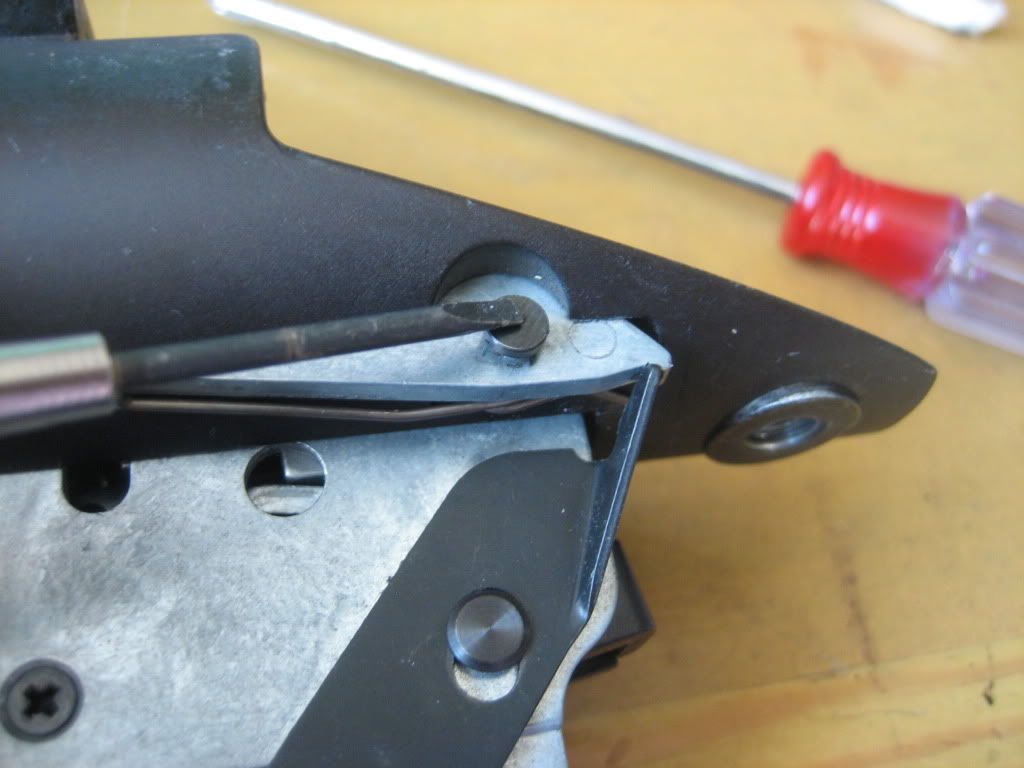
First start by taking this screw out, and carefully removing the spring that it holds down. Dont bend this or it WILL break (my first one did, lucky had my KJW's one handy)
NOTE TO MODS: I may have to double post (many times?) to get all of the pictures in, not sure about the picture cap for posts on this forum... Thanks.
Also a note to all: Yes, my fingers/finger nails are incredibly dirty from taking this rifle apart not 10 minutes before these pictures were taken, and I guarantee if you're taking your rifle down for the first time yours will be even worse than mine. Just a point to remember
So first of all, we're going to start from the very basics and I'm going to cover points that I think are important while I do this guide, starting with the fact that my M40 isn't standard. That much is quite obvious, as I've got a G&G heavy barrel installed and not the standard one so from what I've heard the standard one isn't a free floating one like mine. The standard barrel should have the front sling stud(s) to help secure it. Now the G&G heavy barrel is truly a free float, as it's only attached to the receiver, I'm not going to go into an accuracy debate about Free float vs. Not, it just is free float. Also another thing you'll notice when I get to the bolt, is that I have the PCS bolt, and you may not, and for the most part this won't affect you at all for this guide, it just means that your main screw in the bolt will be longer and you won't have the PCS valve.
There's also some differences in my trigger mech, I've only got one trigger spring in there. Doesn't affect the performance or stability of the rifle, just means I only have one spring. My KJW has the exact same setup, but if you only have one trigger spring too, then you've got to make sure it's on the same screw as mine. This is very important, or your rifle won't function properly.
Ok, now onto the actual rifle. First, it's a good idea to remove any optics you may be running. It's just to make handling the rifle easier but most people would likely do this anyway.
Next to go is the magazine
Then you should locate the bolt release button inside the trigger guard, and take out the bolt. It's not necessary, it just saves you having to do it later.
Now we actually get down to taking the stock off, the first bit you're going to need to do is unscrew the sling stud(s) unless you're me in which case you have a non standard barrel
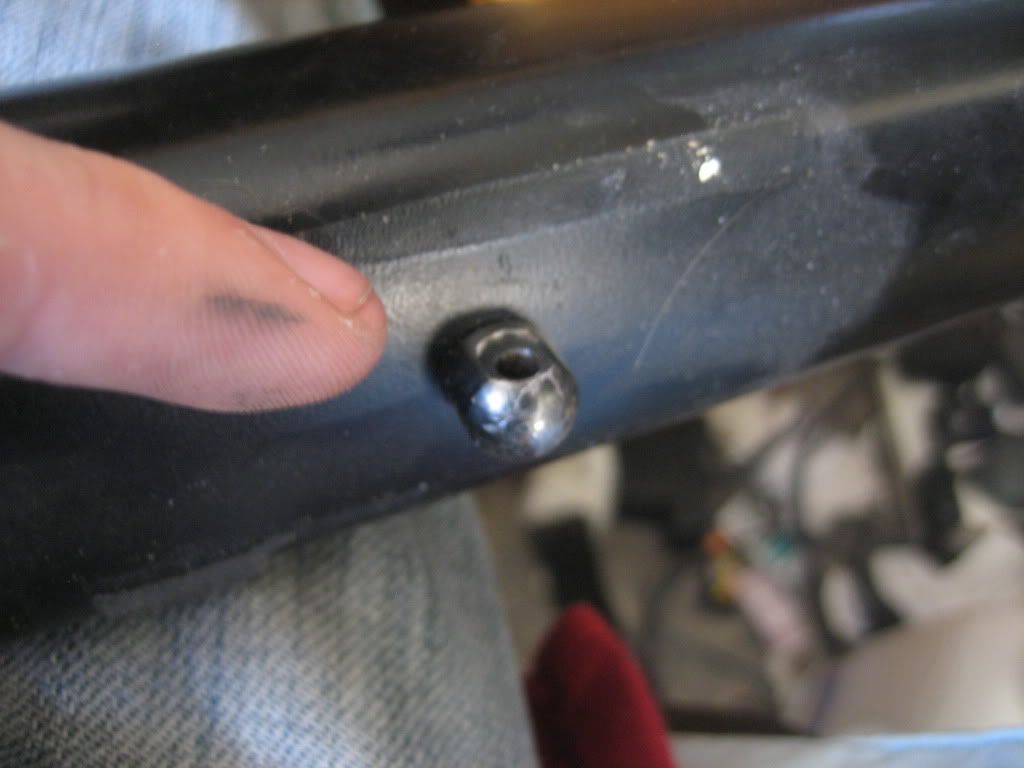
Next goes the allen bolt in front of the mag
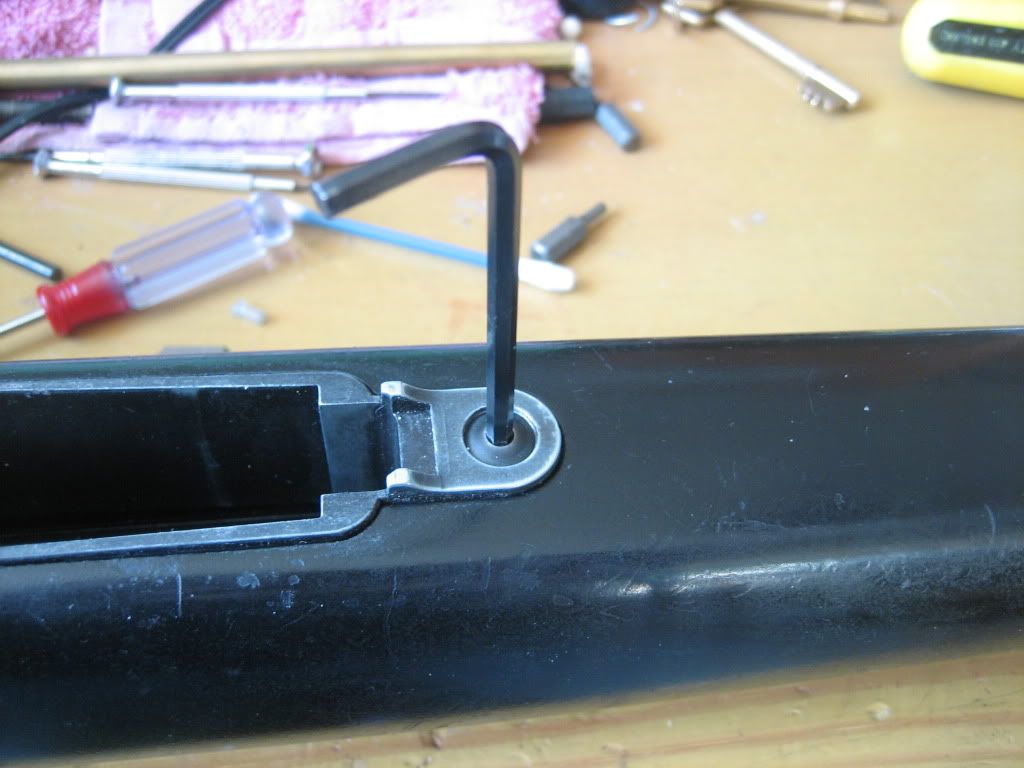
Then the allen bolt behind the trigger guard
Once you've taken these two bolts out, you can just pull the trigger guard off. Lube/clean the mag release if it needs it, and if it doesn't come out don't force it, just wiggle it out. It will come out eventually.
At this point I took my hop wheel out, but you can do this now or later as you please. It just screws out, turn it like you're turning off the hop and just keep going, there's no retention mechanism at all.
Congrats. You've now taken the stock off and you can get down to the action, barrel and hop up.
First comes the hop, your barrel will most likely just screw off, if you look closer you'll see the threads that my barrel is attached to. If it has screws in place, then unscrew them.
once the barrel is unscrewed, the retaining 'nut' will come away from the receiver, bringing the inner barrel and hop up with it. Put the receiver aside because at this point you're not going to be touching it.
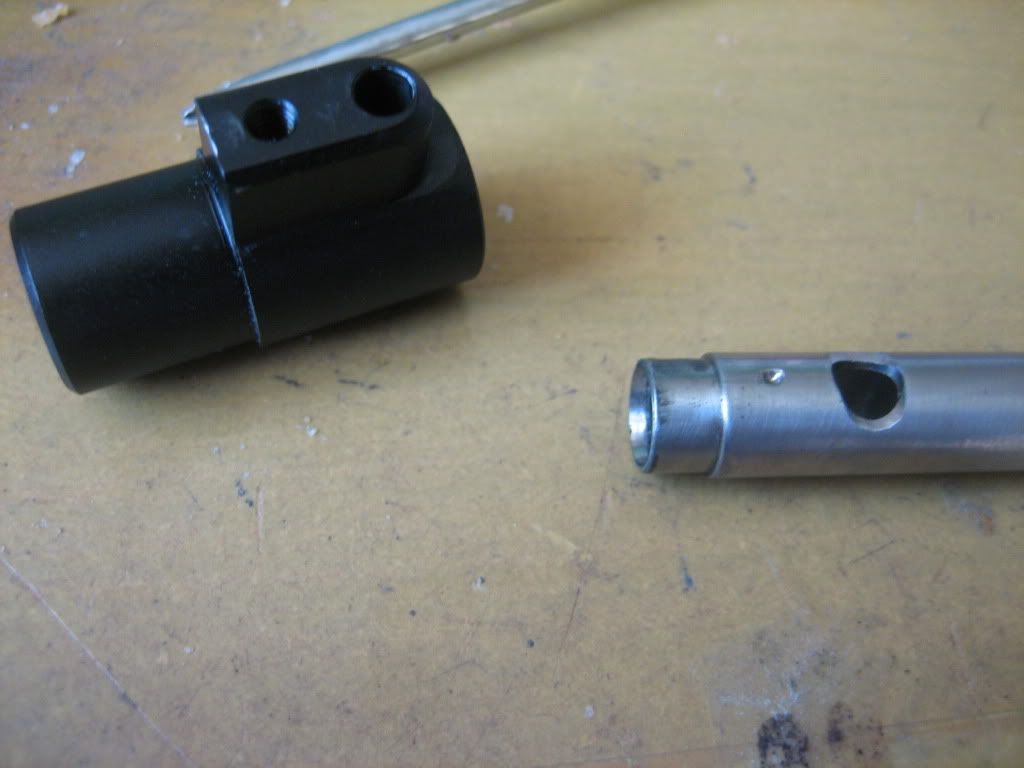
The retaining barrel 'nut' and hop 'brace' will just slide off of the inner barrel, you can put these aside and you're left with the hop chamber, rubber, and inner barrel. I'm planning to replace the stock hop chamber with a Kings Arms or Spartan Doctrine chamber, so I can use VSR barrels and buckings. Much more effective than the stock hop up (especially mine, more on that later).
Make sure you unscrew the retaining grub screw in the hole pictured, it'll tear your bucking to bits if you don't. The other hole is for your nub.
So the main reason for my taking apart this rifle was that my hop was acting like it was fixed. and this is why! No wonder. The makeshift nub was so ruffed up and sharp it had just torn right through my stock bucking. This is why people shouldn't bodge job their gas guns and sell them without checking them first! Oh well, the whole rifle was only £100... With a scope, bipod and all you see in this guide.
This being the inner barrel and stock hop up chamber, without the bucking on so you can see the cutout for Tanaka Barrels.
Now we're going to move on from the barrel and hop up, and go onto the receiver. You can now assemble the barrel if you so wish and are done with it.
All you need to do to get the trigger mech out, is punch two pins out. The first being here;
The second is here, but you can pull it from this side because it has almost a nail (think hammer and nails) type head on it;
Now all you're left with is your bare bones receiver, put this aside to avoid accidental damage by knocking the damn thing off of your work space. Almost did that myself, but it was balancing off of the edge of my desk...
Usually, all you need to do maintenance-wise is drop some silicone oil or white lithium grease (thin) into the mech, and pull the trigger a bit.
For those who have trigger issues, never fear! I'm here to help and I know all about the trigger.
First start by taking this screw out, and carefully removing the spring that it holds down. Dont bend this or it WILL break (my first one did, lucky had my KJW's one handy)
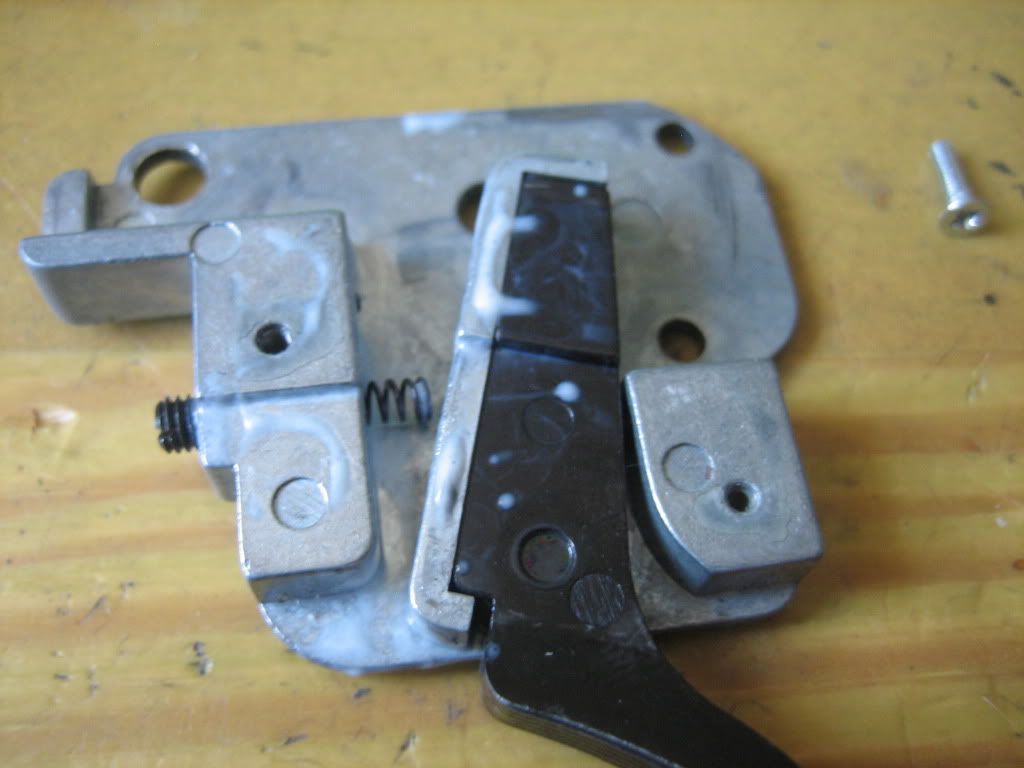
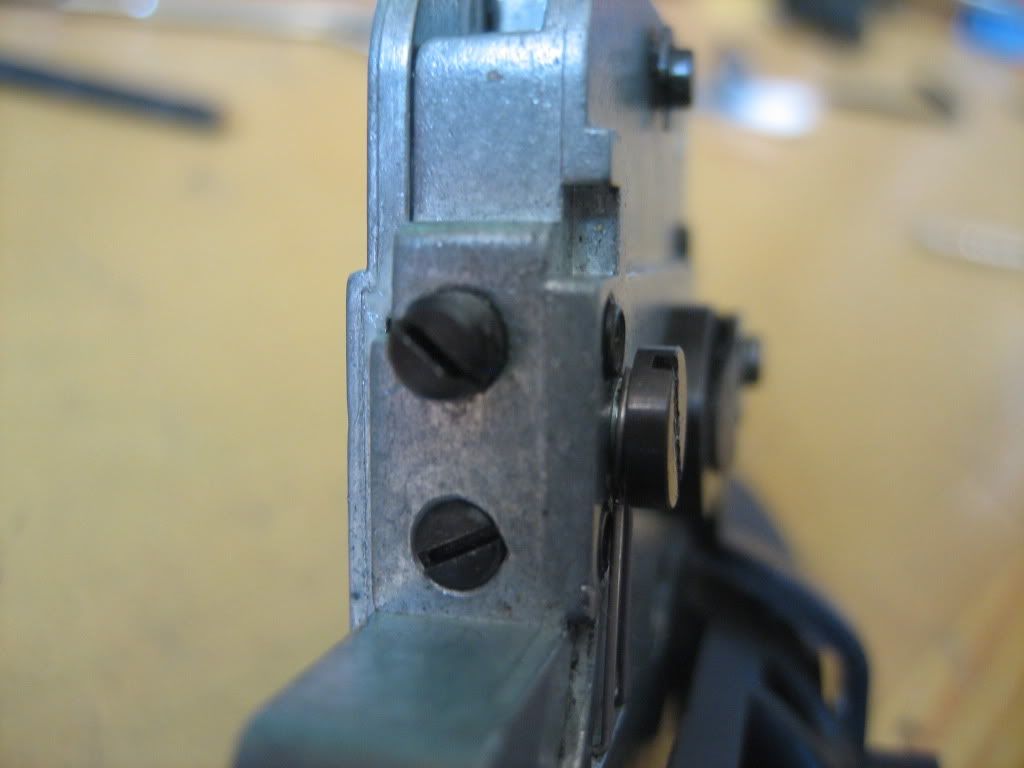
") There's also two screws on the mech, you'll see them. They're crossheads, so think about replacing them before they round off their heads.
There's also two screws on the mech, you'll see them. They're crossheads, so think about replacing them before they round off their heads.